THE MATCH-UP
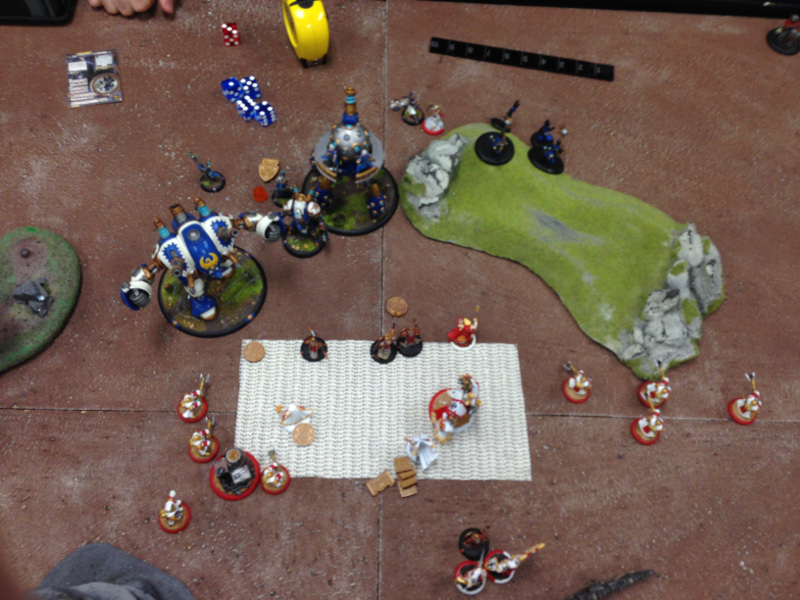
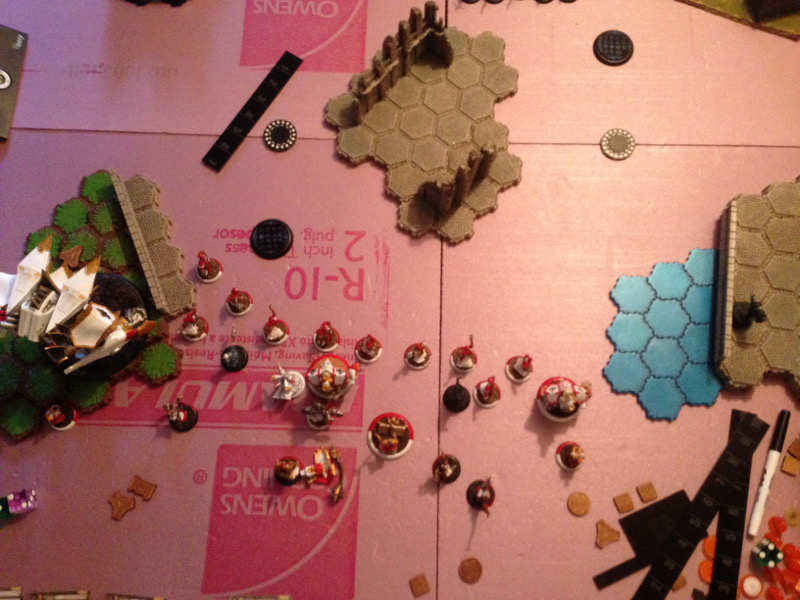
The holiday battle season continues with FatValKilmer going up against Dweomer. FatValKilmer's lists were Lord Arcanist Ossyan and Vyros, Incissar of the Dawnguard. Dweomer rotated Feora, Protector of the Flame into his pairing with Grand Exemplar Kreoss because he felt the random pulling of fate pushing one of the two Retribution players his way. The scenario for the round was Fire Support from the 2014 Steamroller packet. The table was set by a neutral third party (our Trollblood friend from other battle reports). Central to the field was a rocky obstruction with a clear lane running diagonally through it. There was a shallow spot of water spanned by a bridge - the walls of which counted as linear obstacles. There was also a rolling hill, an obstruction of rocks, a trench and a linear obstacle. It was an interesting field and we appreciated having a neutral party put it together.
Dweomer:
I had been waffling over my list selection for a long time and even up until that afternoon was considering the sanity of Kreoss. In practice matches leading up to the game, I had yet to win with my Feora list and felt that it lacked a few tools and punches. Additionally, I was having trouble with the clock. I consider Retribution my worst match and have performed poorly against it. To date, my only win was Kreoss2 vs. Vyros2 … one of the exact matchups possible in this game (literally the same lists and players). If FatValKilmer selected Vyros and I selected Kreoss, I felt like I had the advantage. If he went Ossyan and I went Kreoss, it would be a fast game and we would go upstairs and watch football. FatValKilmer felt that playing Ossyan into Feora would be in my favor, but not necessarily as heavily as Kreoss2 vs Vyros2. So after all that mental list chicked, we went with the expected selection: Ossyan vs. Feora. I won initiative, gave it more than a minute of thought, and elected to go first.
THE LISTS
Lord Arcanist Ossyan
- Banshee
Houseguard Thane
Arcanist
Lady Aiyana and Master Holt
Houseguard Riflemen
Rifleman Officer and Standard
Mage Hunter Strike Force
- Strike Force Commander
Stormfall Archers
Stormfall Archers
Houseguard Halberdiers
- Halberdier Officer and Standard
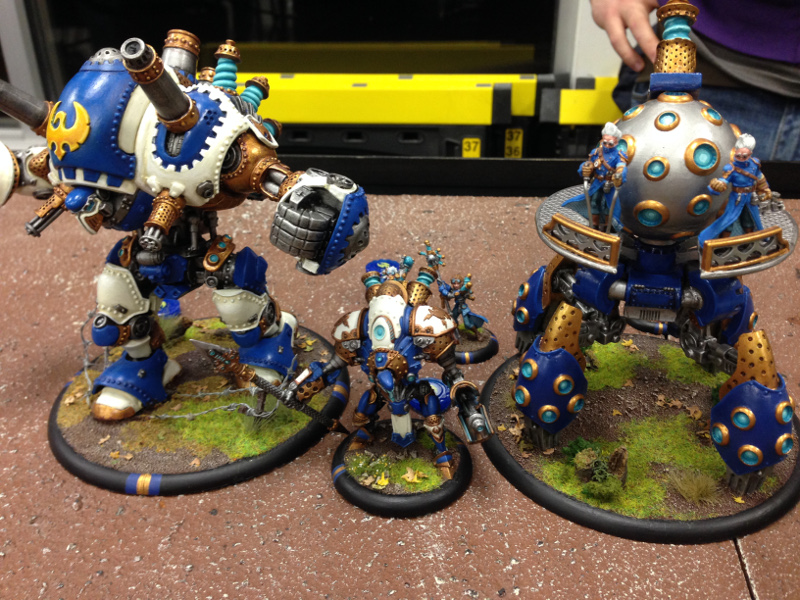
Feora, Protector of the Flame
- Judicator (bonded)
- Vanquisher
- Templar
The Covenant of Menoth
Orin Midwinter, Rogue Inquisitor
Vassal of Menoth
Vassal of Menoth
Allegiant of the Order of the Fist
Allegiant of the Order of the Fist
Choir of Menoth (min)
Holy Zealots (max)
- Monolith Bearer
KEYS TO THE MATCH
Dweomer:
Glim gave me a practice match versus his Ossyan list a few weeks ago. In that one he had the AFG. FatValKilmer had more guns, but spread out into more units. The key for me was going to be sticking with Passage on my Jacks to force Aiyana to give out Magic Weapon instead of Kiss. I also have learned to stop putting my Judicator in the center of the table where all of my opponent's forces can get to it. From prior practice on Fire Support, I knew that contesting the off-side was going to be crucial for me. I had lost on scenario twice in practice. In previous games, I assigned one Monk to each flag. After advice from Monokrol, I started moving them more like a unit and assigned them both to managing my off-side. If I was given an opportunity to jam the MHSF, I would. Other than that, I was going to need to play quickly, accurately, and aggressively in order to keep his guns from taking me off the table. My highest priority target was Aiyana.
FatValKimer:
I have a confession to make: I might be the world’s worst Ossyan player. Coming from Cryx, you’d think I’d be good at moving all those infantry, and to some extent I am: I can cruise through my turns, and Deathclock just doesn’t scare me no matter how many people I’ve got on the board. That said, as soon as those same infantry shoot instead of charge, I get scared and confused and make horrible mistakes. Because I know that I still have a lot to learn about playing Ossyan, and because I know that Dweomer’s Judicator will mulch my poor, flammable infantry while simultaneously mulching Dweomer’s clock, my plan out the gate was to jam hard, not lose on scenario, and win by Deathclock. It’s not the way I’d like to win if I had a choice, but I also know it’s my best chance.
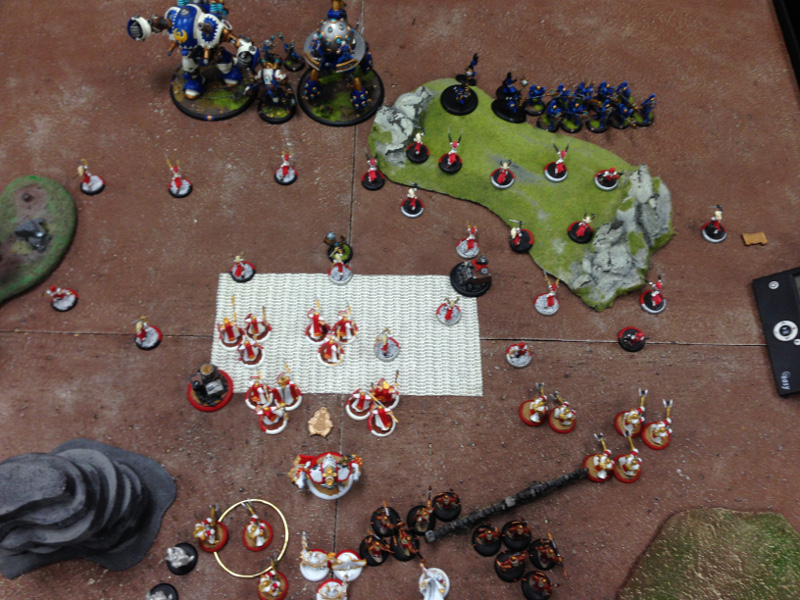
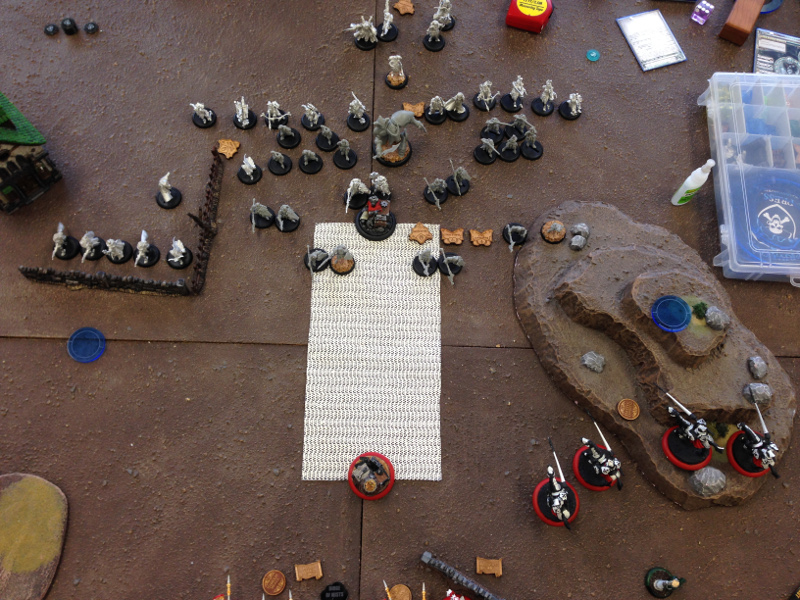
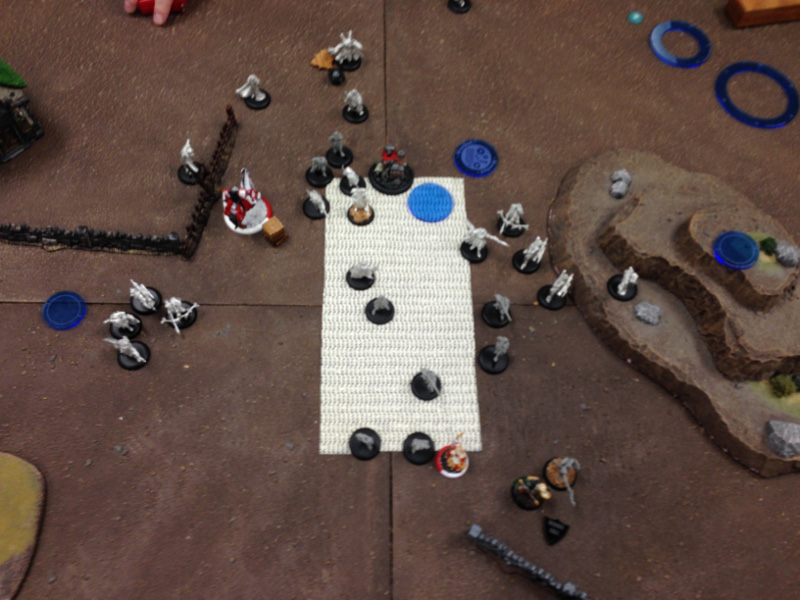
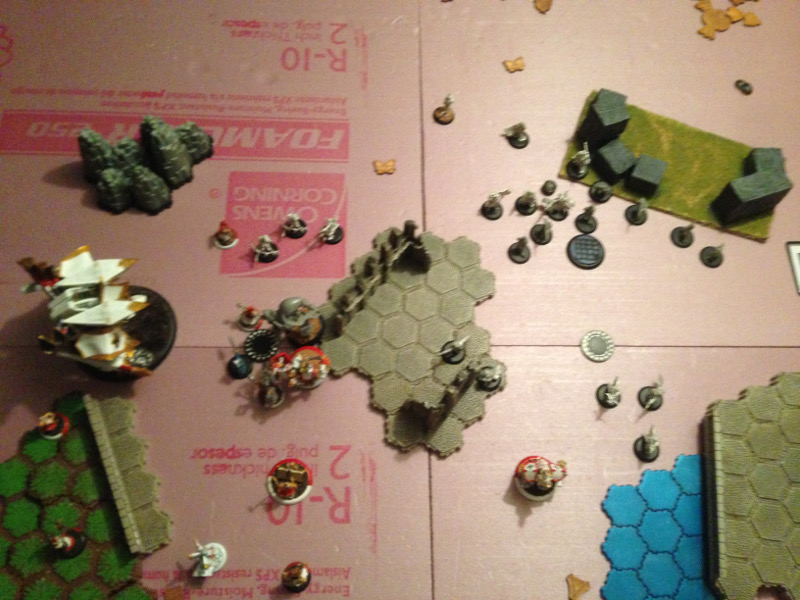
DEPLOYMENT
Dweomer:
Since I wanted Aiyana on fire, I felt like the best play would be to put the Judicator on the hill. It would not give me much of the board and it would make contesting the flag with the Colossal difficult because of the linear obstacle on one side of the hill (like a retaining wall). I fiddled with the Judicator for over a minute on pre-deployment before settling him down. The issue was that the hill was a bit farther from the center of the board than I would have liked and I knew the linear obstacle on the end of it would force me to go around it to get to the center of the table. The Zealots were going to need to fill the middle and use the LOS blocking centerpiece to whatever advantage they could get. That left the Monks and the Vanquisher on the other flank and the Templar for escort duty / late game work.
FatValkimer:
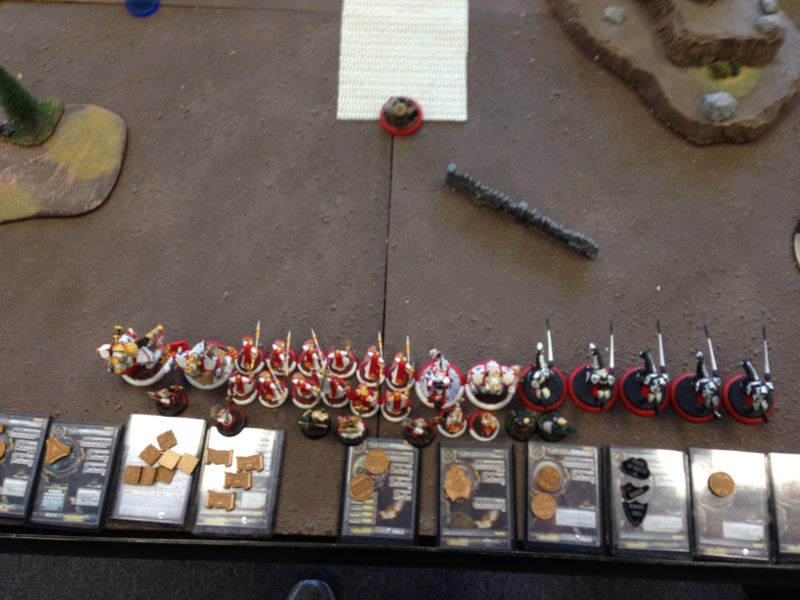
I forgot that the Judicator was on the hill, or maybe I didn’t notice, so I went through a whole bunch of effort to try and screen my halberdier officer from direct fire. That whole unit got deployed on my right to rush at Dweomer’s heavily defended flag and try to contest it. The two units of Storm Fall Archers were deployed in the middle so that they could threaten anything that didn’t get Hymn of Passage. The rest of my army went on my left to put a lot of pressure onto my friendly objective/flag.
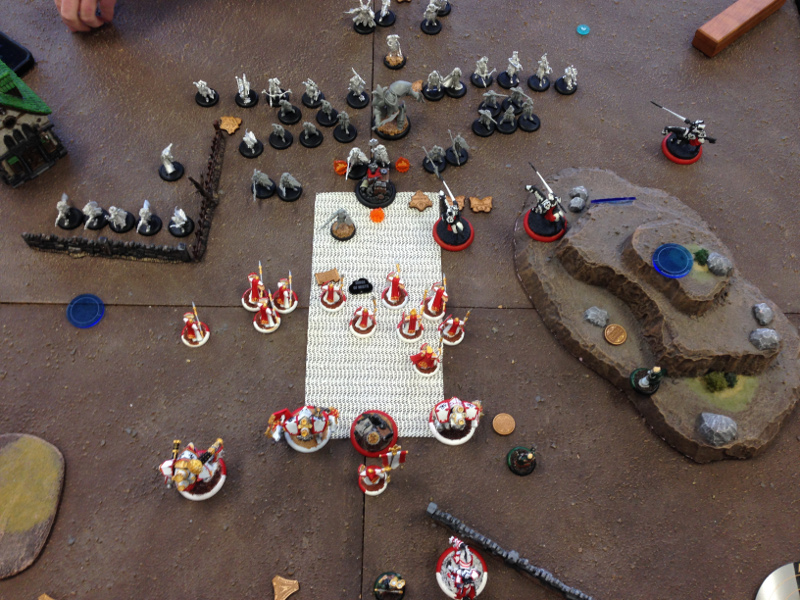
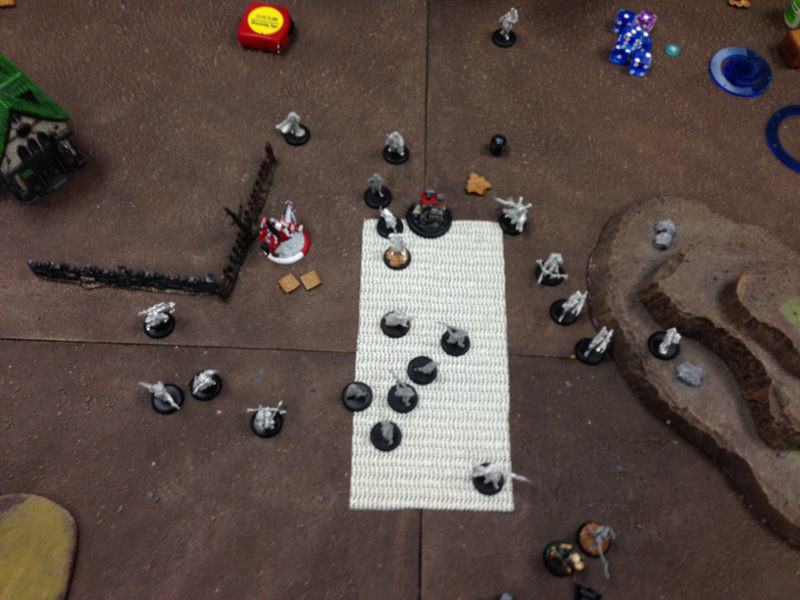
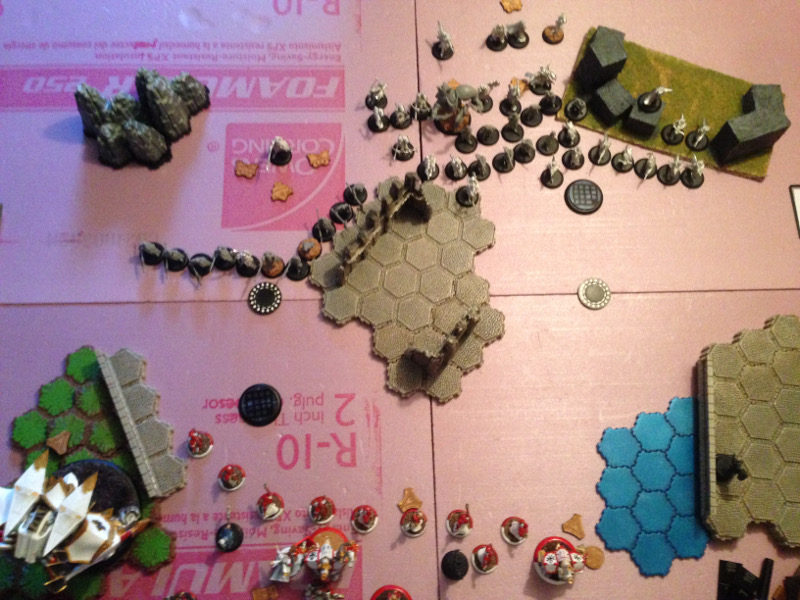
TURN 1: PROTECTORATE OF MENOTH
Dweomer:
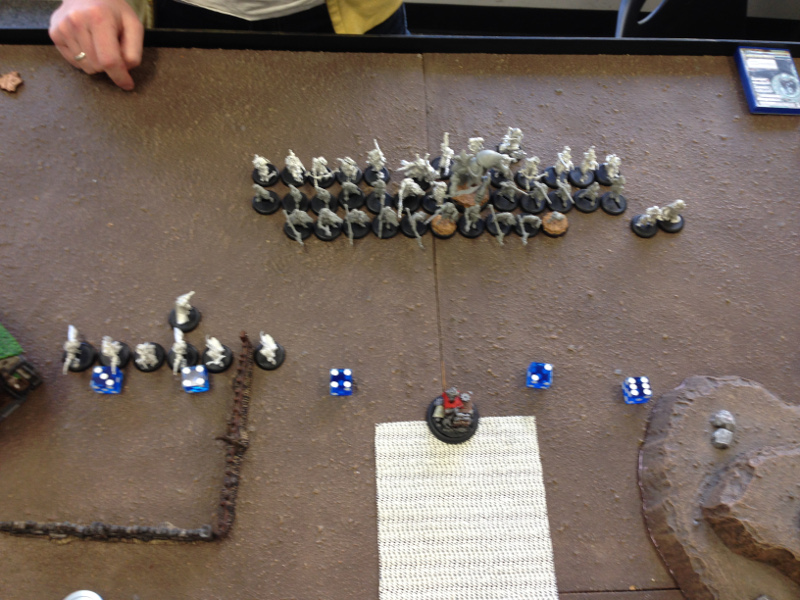
I took a minute or two considering advance and shoot distances from the MHSF. I decide not to mini-feat the Zealots. They pray for Warding and run forward, stopping short of their max distance to save themselves from easy guns. With Escort up, Feora Fire Steps and advances to the left of center. The Judicator runs and gets an ancillary attack that goes nowhere and does nothing. The Templar shifts left towards Feora and behind the Zealots. I accidentally jammed one of my monks, so he goes into the Shifting Sands stance and advances. The other Monk runs and buttons up to a linear obstacle on the bridge. The Book advances and intones no Knockdown. The Choir advances and sings Passage. Passage is going to be what keeps me in the game versus Retribution guns. i do not anticipate ever chanting Battle this game.
TURN 1: RETRIBUTION OF SCYRAH
FatValKilmer:
I put quicken and desperate pace on the Halbs. They shield wall and advance toward the right flag, then reform until they’re basically on it. The rest of my army goes in the direction of my objective. One of the Mage Hunters shoots a single Zealot.
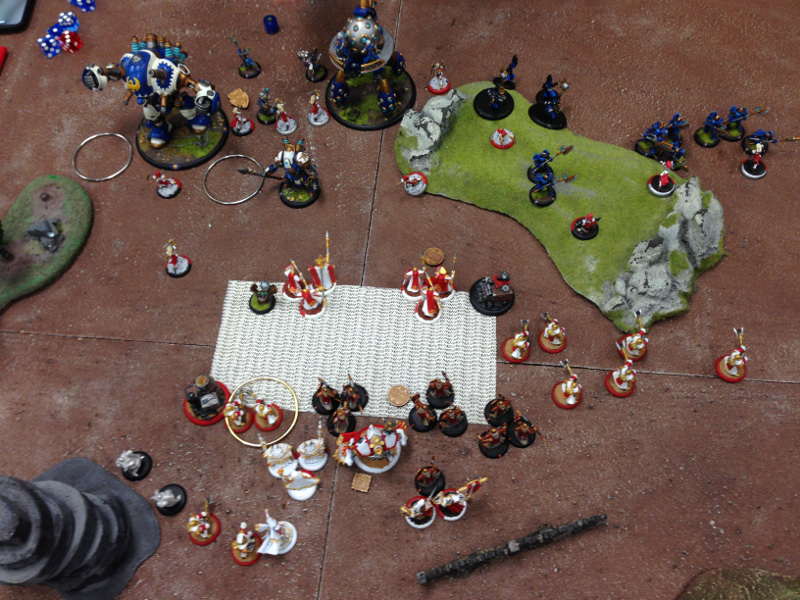
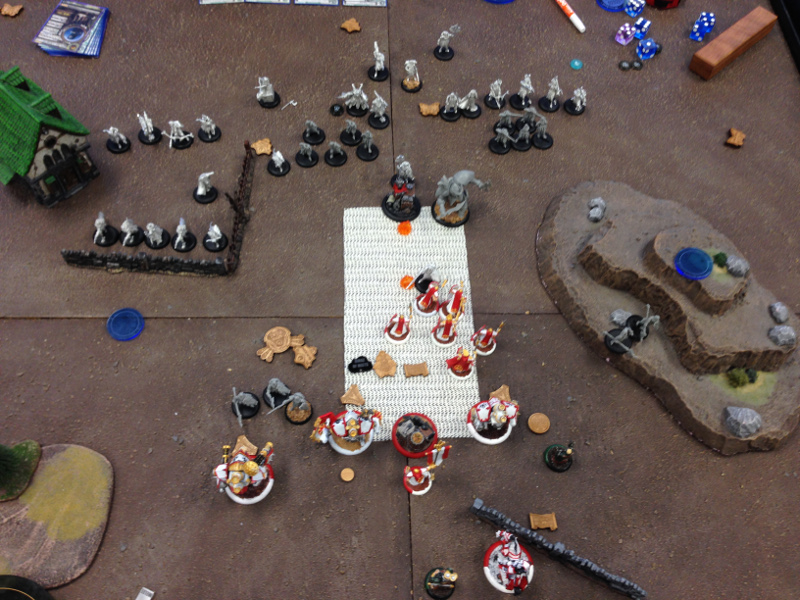
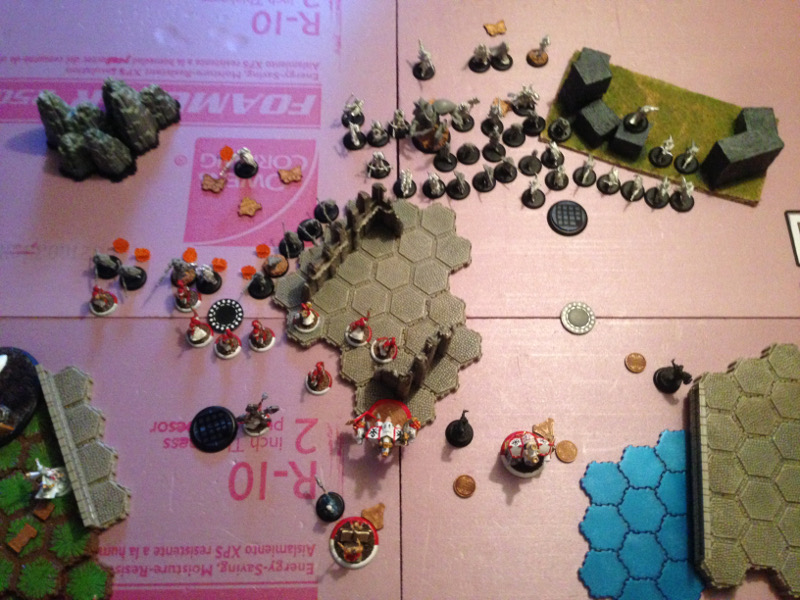
TURN 2: PROTECTORATE OF MENOTH
Dweomer:
Feat turn. Feora upkeeps Escort. The Choir puts Passage back on the Jacks. The Judicator advances to the edge of the hill and launches all sorts of ranged attacks against the Halberdiers (technically looking for long deviations). One of the Halberdiers drops and a pair are lit on fire. The Zealots pray for Warding again, mini-feat, and charge/run. Feora advances, sprays through several Zealots, feats, and fire-steps away towards the hill. The fire is pulled from the two Zealots and collected from four Halberdiers, then redistributed onto the front line. One focus gets allocated to the Templar. The Templar runs to the center of the board. The Vassal Enlivens the Vanquisher. The Vanquisher advances and shoots towards the MHSF. I get another terrible deviation and only managed to catch one MHSF (he dies to blast damage). The Monks raise the Shifting Sands stance and advance towards flag. One is in position to contest. Again the Book advances and chants for no Knockdown. Orin advances and raises a Null Magic zone.
I made a huge mistake with Feora this turn by completely forgetting about the sides of the Killbox. I catch it during my opponent's next turn and award him two control points. This is not the first time I have Killboxed myself with Feora (with this list!) in this scenario.
SCORE: RETRIBUTION 2, PROTECTORATE 0
TURN 2: RETRIBUTION OF SCYRAH
FatValKilmer:
Feora’s fire does good work and nearly every Halberdier dies to fire. Most of the Stormfall archers shoot Star strike shots onto the mini-feated zealots, catching most of them on fire (take that, Feora!) while a few (and the Banshee) shoot at the objective. I roll like crap, it takes some damage, but I don’t kill it.
The MHSF get magic weapons for Aiyana, and advance recklessly to (I think) toast the Vanquisher. I’ve somehow forgotten about Enliven, and the warjack takes one good shot and then waddles (This is how I imagine it moves under Enliven as well - Dweomer) away from the rest of my jack hunters.
SCORE: RETRIBUTION 2, PROTECTORATE 0
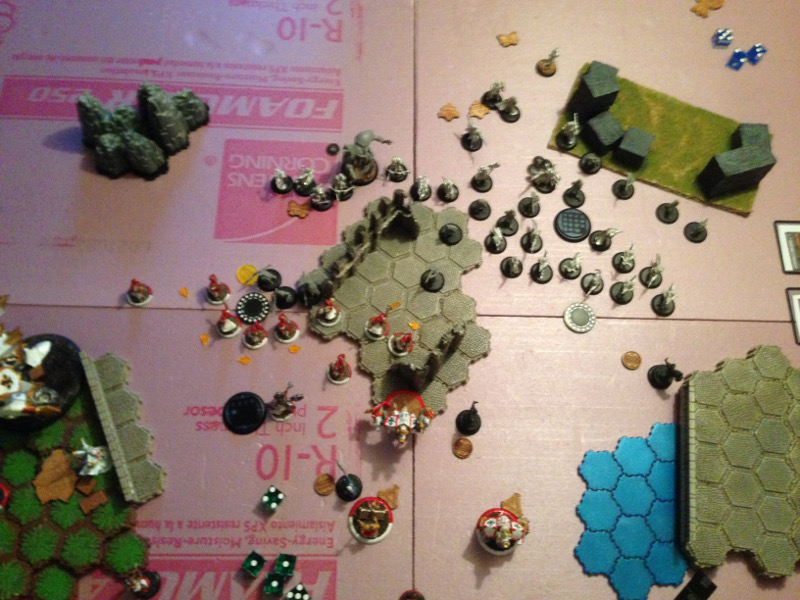
TURN 3: PROTECTORATE OF MENOTH
Dweomer:
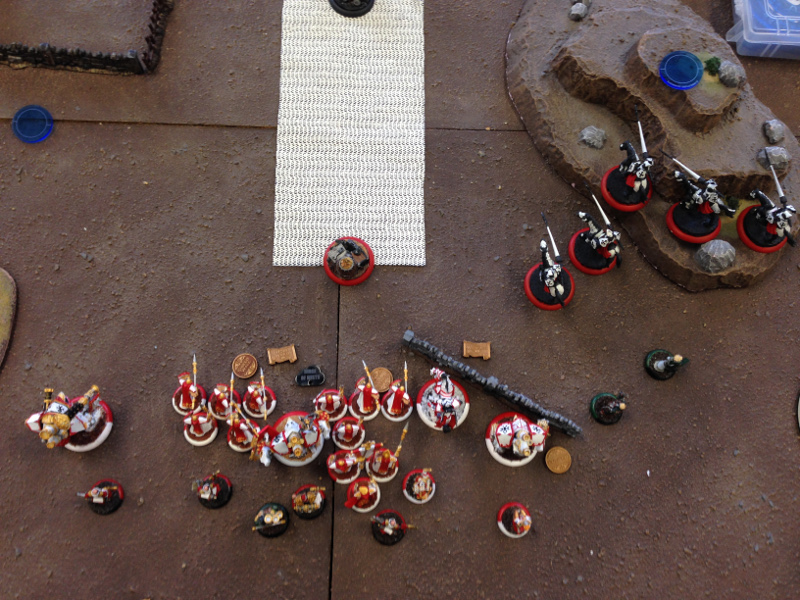
Dropping fire on the Zealots was a great play, but there was little I could do to prevent it. In fact, it is about the least damaging thing that could happen to my force because it gives my grunts a chance at living. True to math, two of the six fires go out while the other four Zealots burn to death. The Templar attempts to clear off the remaining Halberdiers, but only takes out one. The Judicator advances and rockets and sprays the remaining Halberdiers away. A long deviation hits the Arcanist but fails to kill. One Monk attempts to tackle the Objective but only drops it to about 7 boxes. The other stances and jams the MHSF. The remaining Zealots throw some bombs, killing a few MHSF and an archer. The Vanquisher takes out some Riflemen and gets Enlivened. Orin runs to control the flag. Feora runs to a safe Killbox spot.
At this point I have burned so much clock. Turn ends with 30 minutes on FatValKilmer's clock and just over 3 minutes on mine. I don't know where it all went. I lost 5 minutes to deployment and 10 minutes to turn 1. Somehow Turn 2 and Turn 3 took a total of 42 minutes. Looking back I don't know where it went. I feel disappointed that I am doing well and about to lose to the clock.
SCORE: RETRIBUTION 2, PROTECTORATE 1

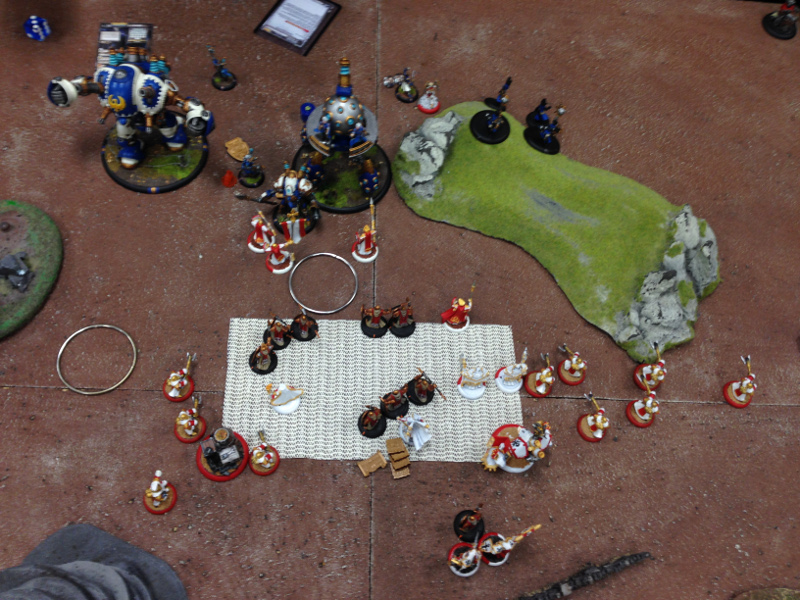
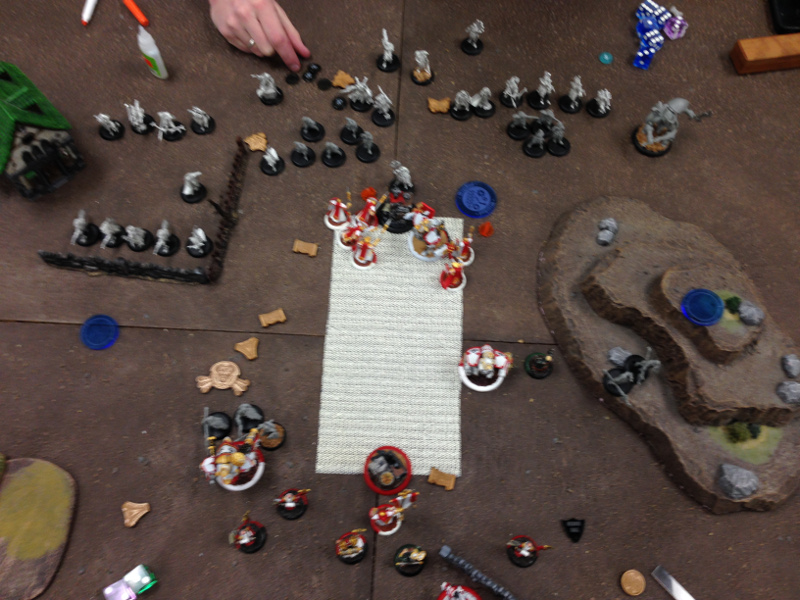
TURN 3: RETRIBUTION OF SCYRAH
FatValKilmer:
My remaining Stormfall Archers advanced and shot at the opposing objective and actually managed to kill it this turn. I then charged my fully-loaded Banshee (with concentrated power) into his Templar but only took out his movement. That’s okay, though, because killing a jack takes time, and I just need to stall for three more minutes.
My MHSF activate, and three walk out of melee with the kicky-monk. They get punched to death handily. The others (with magic weapons from aiyana) move up and shoot the Vanquisher, standing in a formation that will prevent all of the contesting mage hunters from getting killed by the same Thresher. The Riflemen mini-feat, aim, and blow the monks off the table. I’m actually surprised with by how effectively that worked--I hadn’t expected to clear the flag. Because of this, my caster is blocked in by my objective and my Riflemen, so I won’t be able to run him over, Dominate the Flag and win. I want to say that it might have been toward the end of this turn that Dweomer realized he’d Killboxed himself earlier in the game, and so until that point I hadn’t been planning on being in a position to win at all, but I might be mis-remembering (It was the prior Turn, your Turn 2 - Dweomer).
SCORE: RETRIBUTION 3, PROTECTORATE 1
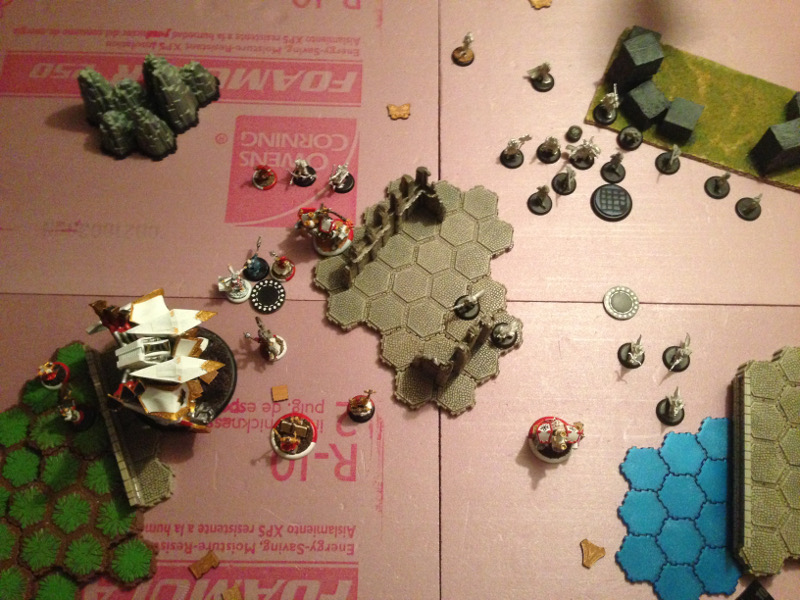
TURN 4: PROTECTORATE OF MENOTH
Dweomer:
I have three minutes. The loss of the Monks basically put the game away from me. I had a shot at scoring four points with them still in the mix. I probably should have run Feora to the flag for Domination and risked the attack by the Banshee. Then I would have only needed three to win which was possible (clear the Banshee, dominate my Flag, Vanquisher the Objective. Looking at the picture of the board now, away from the game, I can see the optimal play. But with three minutes on my clock and embarrassed at how poorly I managed it, I couldn't unlock the puzzle at the table. The Templar gets three focus and uses Beat Back to put the Banshee out of range, except I roll fire and take it off the table. Feora runs to dominate. I activate the Judicator to take a downtown shot towards the objective and time expires.
SCORE: RETRIBUTION 3, PROTECTORATE 3
VICTORY FOR RETRIBUTION!
Thoughts on the Match:
Dweomer:
We talked about it after the match and summarized my play the following way: "I made excellent decisions slowly." I had to be careful because of the threat of his guns, but I was probably overly careful (which translated into slow play) because of my overall struggle with Retribution. The entire time I believed that one wrong footed step and I would be completely wiped off the table. This is probably not a thing that would happen. I felt like with ten more minutes on my clock, I would have had the scenario victory. I made the right choice with list selection, but some combination of missing tools and cautious play buried me. FatValKilmer, even though his strategy was to watch me burn up my clock, was a fantastic sportsman and helped me with all the fiddly bits of deviations. Even on my last turn, he did what he could to make my Banshee-wrecking Templar activation as zippy as possible (it was essentially me just calling out damage and neither of us worrying about the Beat Back distance as it happened).
Things I did wrong:
- There was zero excuse for me to Kill Box myself. Considering that I did it to myself with the same list on the same scenario two weeks prior to this match should have burned in to me the dangers of the table edge.
- I burned five minutes deploying and ten minutes on turn one. That is inexcusable as well. Somehow I let 42 minutes go by in two turns. I have practiced my Judicator play, my opponent helped me out on all of the deviations, and the minutes still cooked away. Slow play is my bane. I feel like I make good decisions, but I need accept slightly less optimal plays much much faster.
- I should have recognized the challenge of needing to score on three turns versus on two turns to win. I should look more into two point turns and three point turns (versus one point, three points, one point) until I can get my clock issues improved.
Things I did right (in my opinion):
- Although I burned too much time to do it, I made good positioning choices, good buff choices, and good target selections. I never gave my opponent very clean opportunities to remove my pieces. At the end of the day, he only capped nine army points (half the Zealots, half the Choir, and both Monks)
- I feated at the right time. I took the first opportunity I could to make something of my feat. I was able to strip almost all of the Halberdiers off of my side of the board. That made scenario live for me. If I had failed to do so, I would have been picking them off too slowly to accomplish anything for the rest of the game.
Overall, it was a good game. FatValKilmer is always a fun opponent. We have a great time playing each other and push ourselves to play clean, ordered matches. Thanks for the game FatValKilmer, we are allies now, so let's start teching against the rest of the field!
FatValKilmer:
Knowing that Dweomer plays slowly, my plan boiled down to: do dumb things fast, try to have the best feat I can. I never ended up feating because of where I committed my army (and if I had feated, it never would have been great) but I certainly did plenty of dumb things fast.
Things I did wrong:
I either over- or under- committed the Halberdiers. I needed to remember that Shieldwall wasn’t worth very much in this fight, and so I could have run them a lot further forward to claim board space.
I forgot about Enliven. It would have been easy as pie to knock down his Vanquisher. Banshee’s gun is pretty great at that. After that: no more Vanquisher, and an easy path to a scenario victory.
I needed to keep Ossyan freed up in order to be able to run to a Flag that needed dominatin’.
Things I did right (in my opinion):
Dumb things fast.
I used the Riflemen well to clear the kicky monks off the flag. No one else in my army was going to be able to do it.