Sunday, November 29, 2015

Temple Flameguard (painted)


I am switching my paint scheme for my Protectorate of Menoth army over to a purple / bronze with red highlights. I started when I picked up Anson Durst...

Recently I have repainted a pair of Templars and my Holy Zealot unit (plus Monolith Bearer). Next up for the holiday weekend was my first Temple Flameguard unit. When I first acquired these guys, I was a bit too into Exemplar Errants to appreciate everything the TFG do for the Protectorate. They have since become one of my very favorite units to put on the table. I think I spent about 20 hours repainting them into my new purple/bronze scheme. I just couldn't stop and the hours kept slipping by. Hopefully the pictures do them justice. They might be the best work I have done to date.


(Temple Flameguard Officer and Standard Bearer, November 2015)

(Temple Flameguard Unit Leader, November 2015)

(Temple Flameguard Grunt pose 1, November 2015)

(Temple Flameguard Grunt pose 2, November 2015)

(Temple Flameguard Grunt pose 3, November 2015)

(Temple Flameguard Leader and various Grunts, November 2015)

(Temple Flameguard Unit and Attachment, November 2015)

(Temple Flameguard Unit and Attachment, November 2015)


Thursday, November 26, 2015

Holy Zealots (re-painted)


I am switching my paint scheme for my Protectorate of Menoth army over to a purple / bronze with red highlights. I started when I picked up Anson Durst. So far I have completed Durst, a Vassal of Menoth, and pEiryss (for some reason). 
I haven't made the dive with a unit yet, but I did strip and reprime my Holy Zealots, so I guess they are up first.

That was last week. Last night (in the wee hours), I put the final washes and touch ups into my new Holy Zealot paint scheme. The first time I painted my unit of Zealots was in October of 2013. Here is what it looked like then:

(Holy Zealots and Monolith Bearer, October 2013)
Copy of Photo Oct 20, 12 56 49 PM.jpg

Garbage lighting, terrible focus ... all things that sort of but not really hid my heavy hand, lack of thinned paints, unawareness of dry brushing, and ugly choices in basing.

But they sure were shiny red.

Here is the unit now, two years later, in my Purple Menoth scheme. I used a lot of dark washes to dirty them up. I am not very pleased with how the Monolith Bearer came out. I waffled on some color choices late in the process and the Leader and UA suffered the most from it.

(Holy Zealot Leader and Monolith Bearer, November 2015)


(Holy Zealots pose 1, November 2015)

(Holy Zealots pose 2, November 2015)

(Holy Zealots pose 3, November 2015)

(Holy Zealots and Monolith Bearer, November 2015)

I like how they came out. I wish my camera was better. I think they are going to look very cool on the table. Good luck, guys!


Saturday, November 21, 2015

Templars (painted)


I am switching my paint scheme for my Protectorate of Menoth army over to a purple / bronze with red highlights. I started when I picked up Anson Durst. So far I have completed Durst, a Vassal of Menoth, and pEiryss (for some reason). I haven't made the dive with a unit yet, but I did strip and reprime my Holy Zealots, so I guess they are up first. 

I did make a non-magnetized Templar for Durst with the scheme. I liked it so much that I stripped a magnetized kit, swapped out the chassis with a "Vanquisher only" pack I picked up off eBay a while back, and made a second fixed Templar with the new scheme.

Here are the results.

Templar 1:


Templar 2:


And the two together:


Wednesday, November 11, 2015

Warmachine Battle Report: Anson Durst, Rock of the Faith vs. Major Markus "Siege" Brisbane

Anson Durst, Rock of the Faith vs. Major Markus "Siege" Brisbane


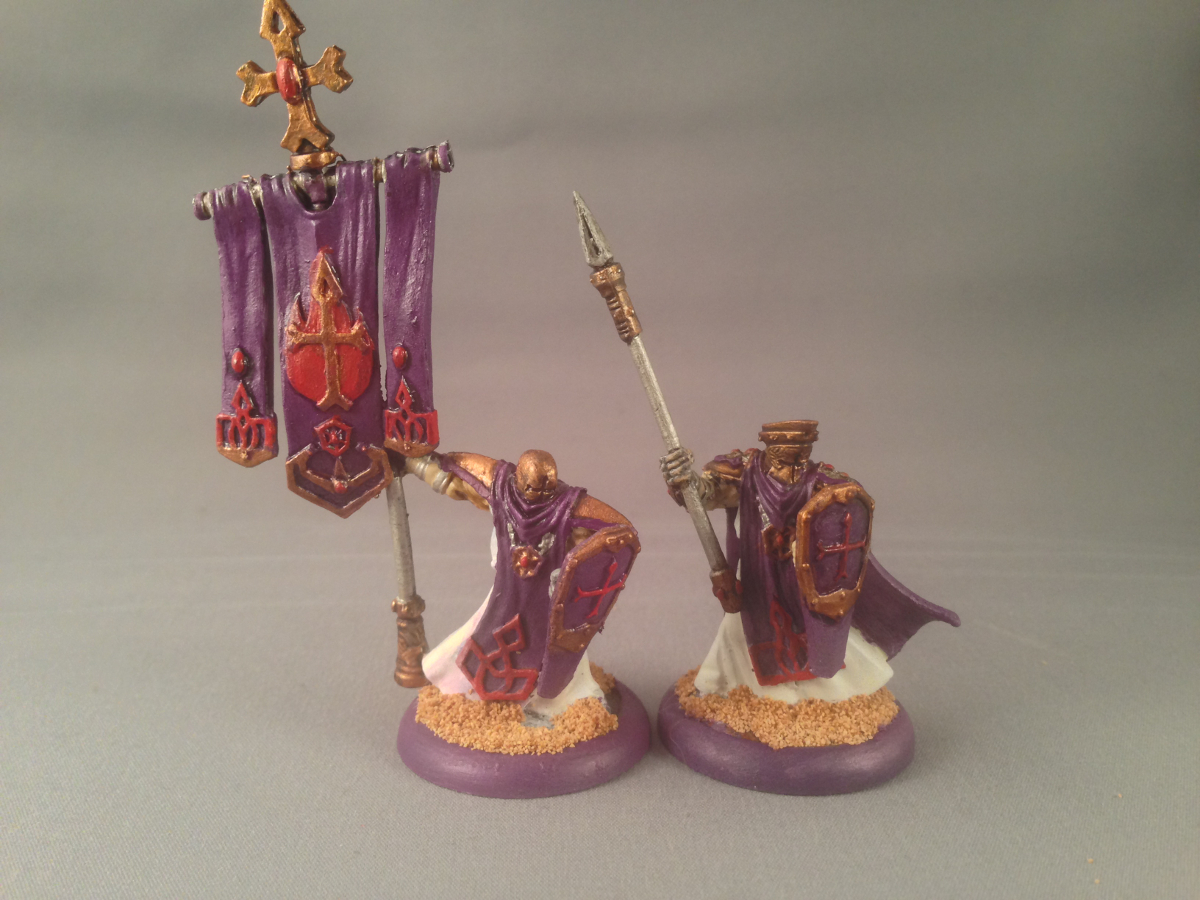
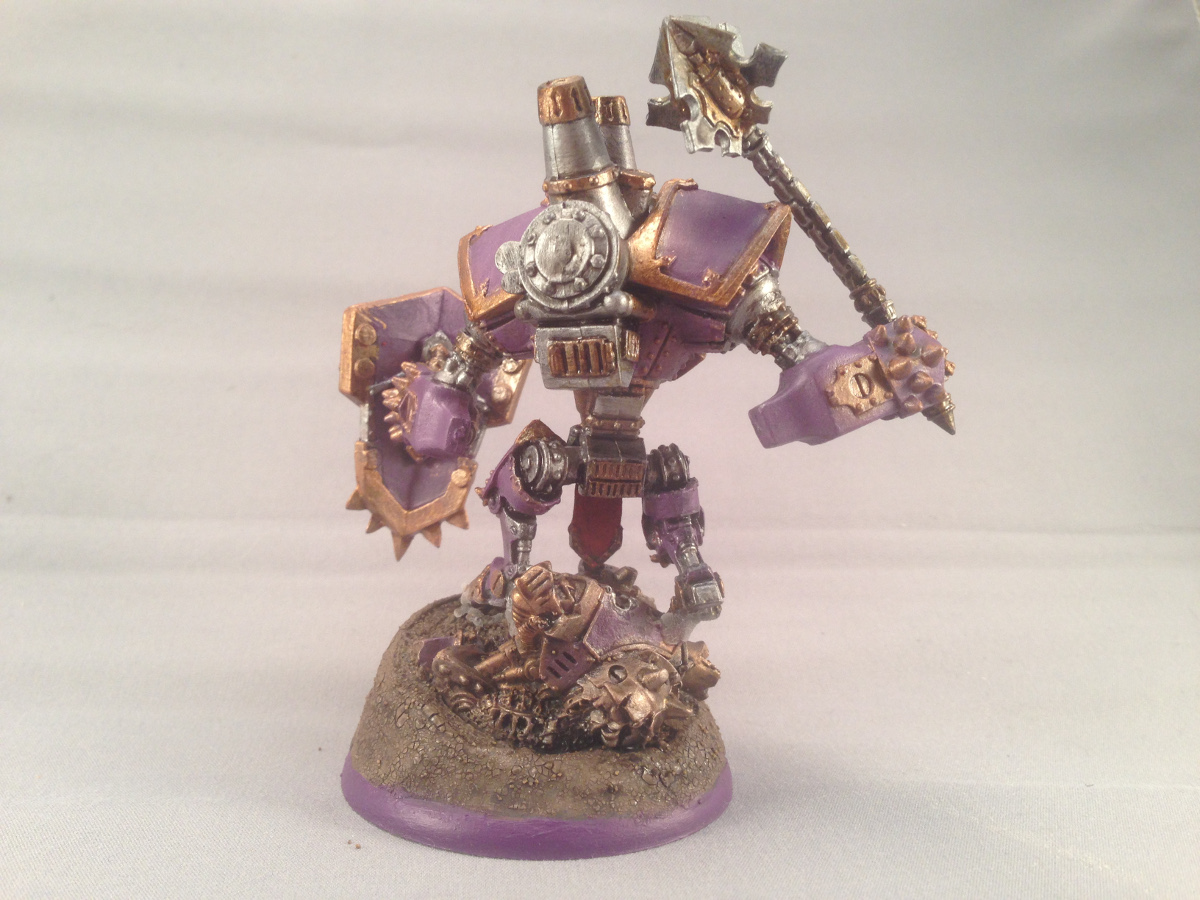
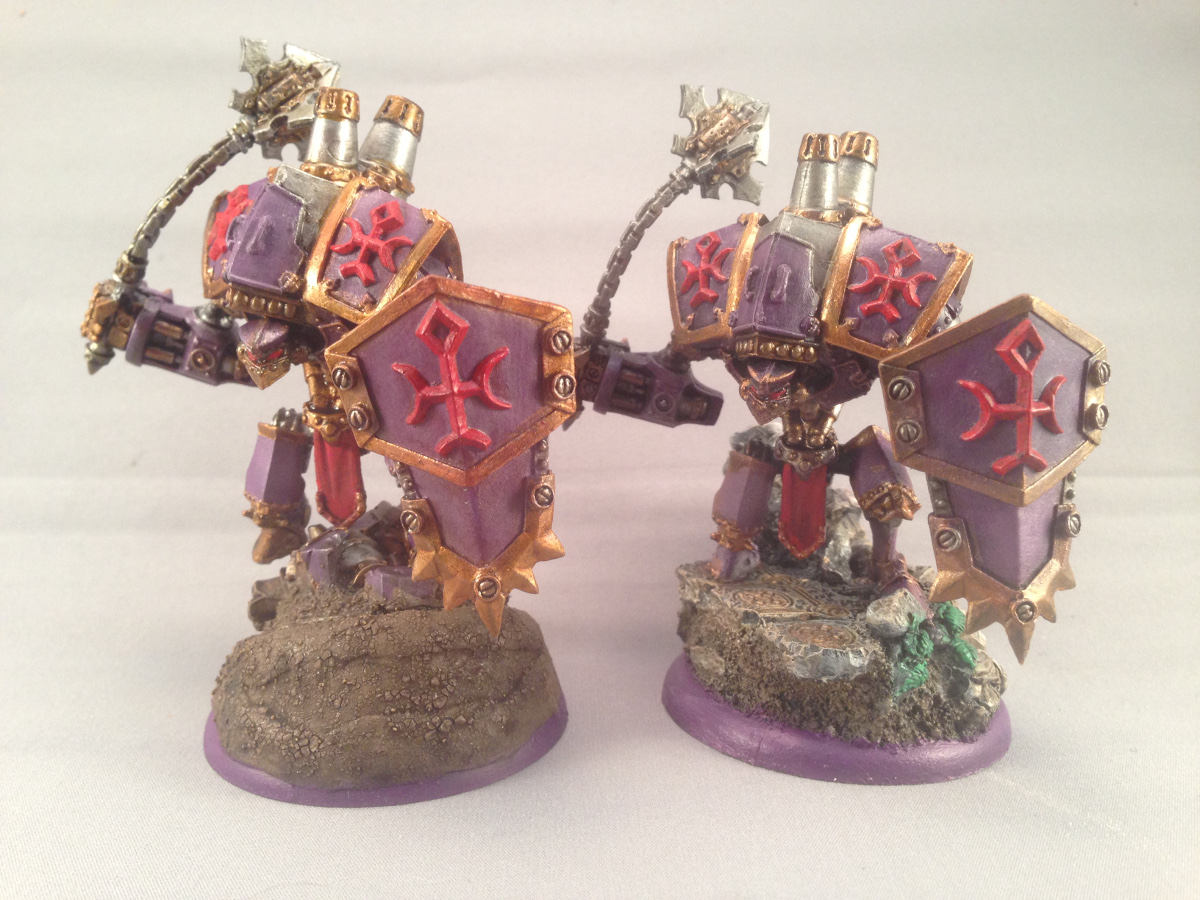
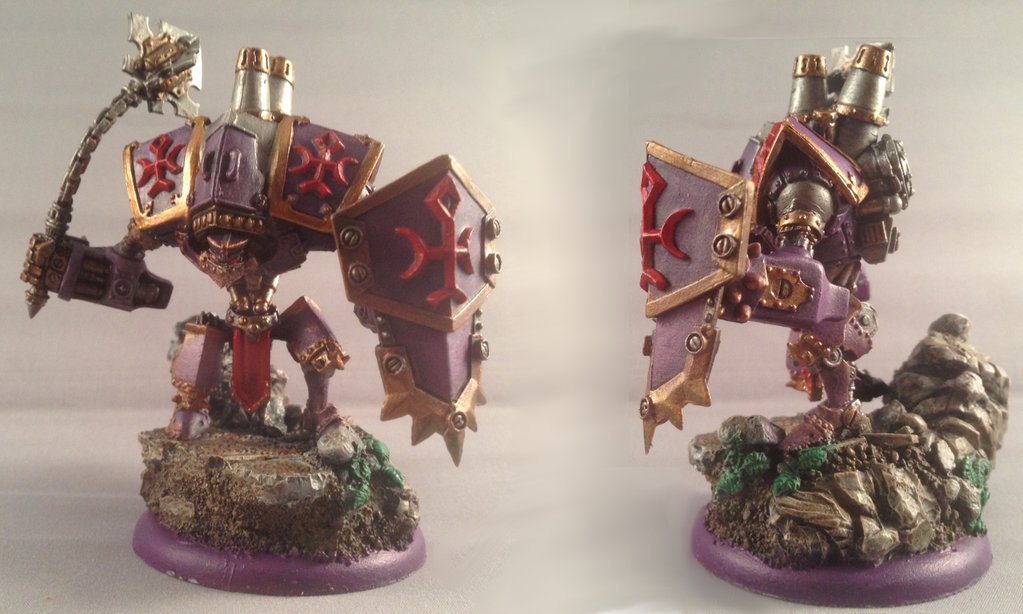
It was a "bring something you want to have fun playing" night. I had recently finished this guy for Durst and wanted to get him on the table:


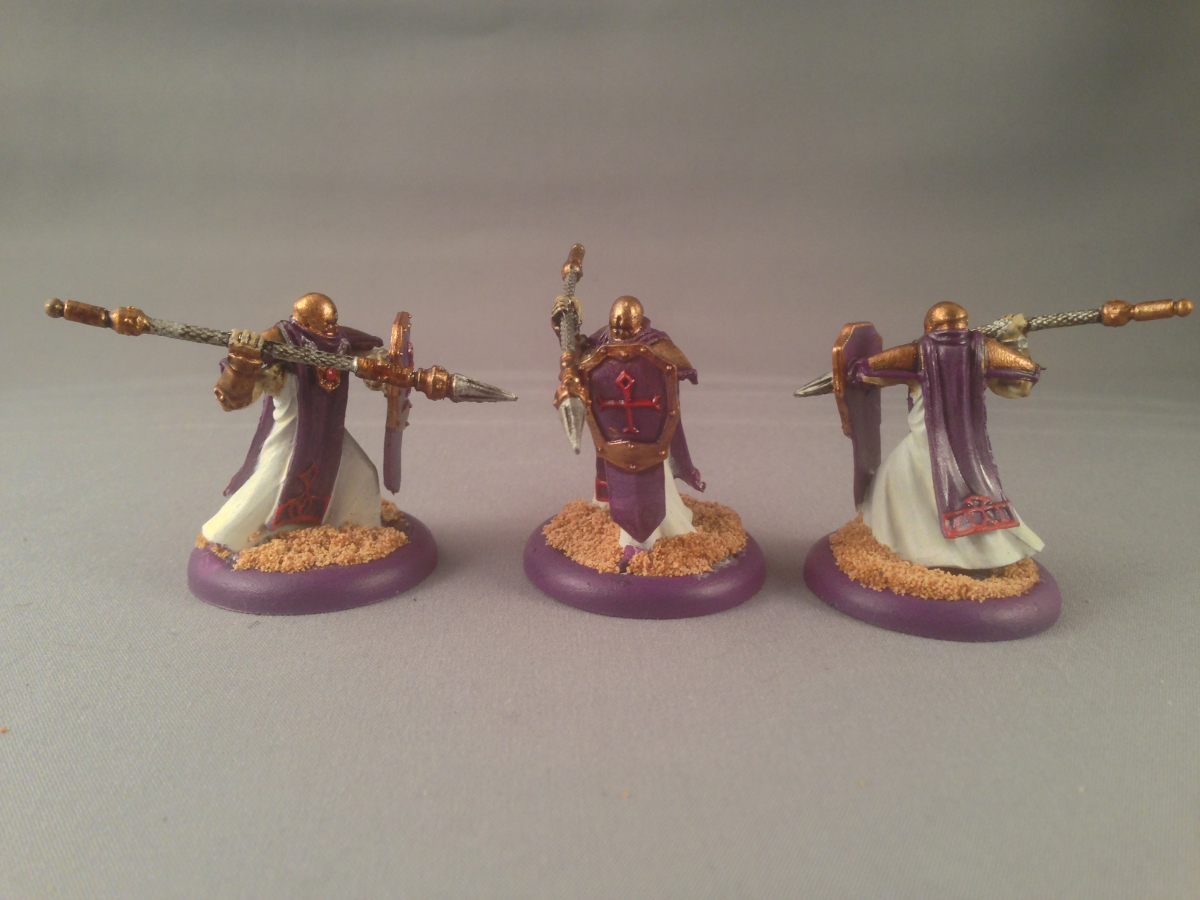
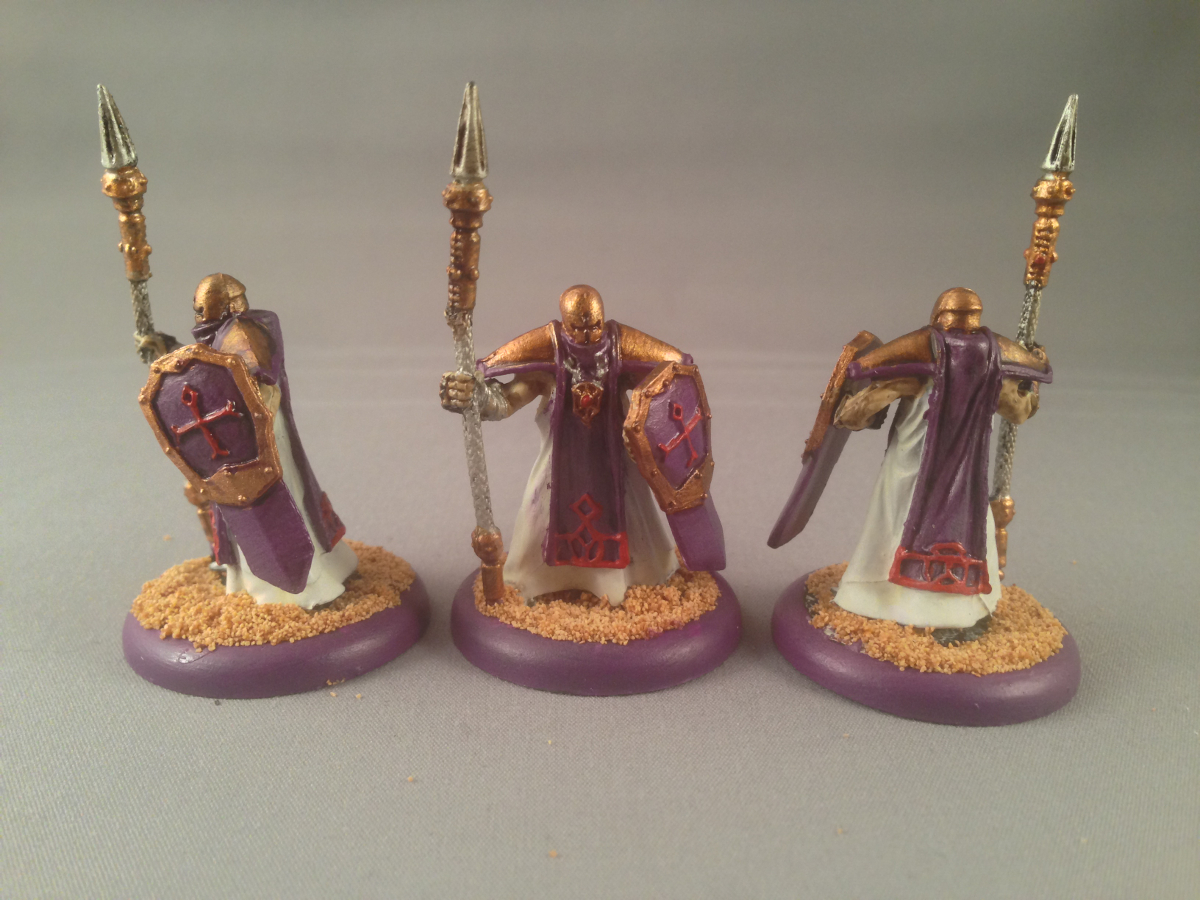
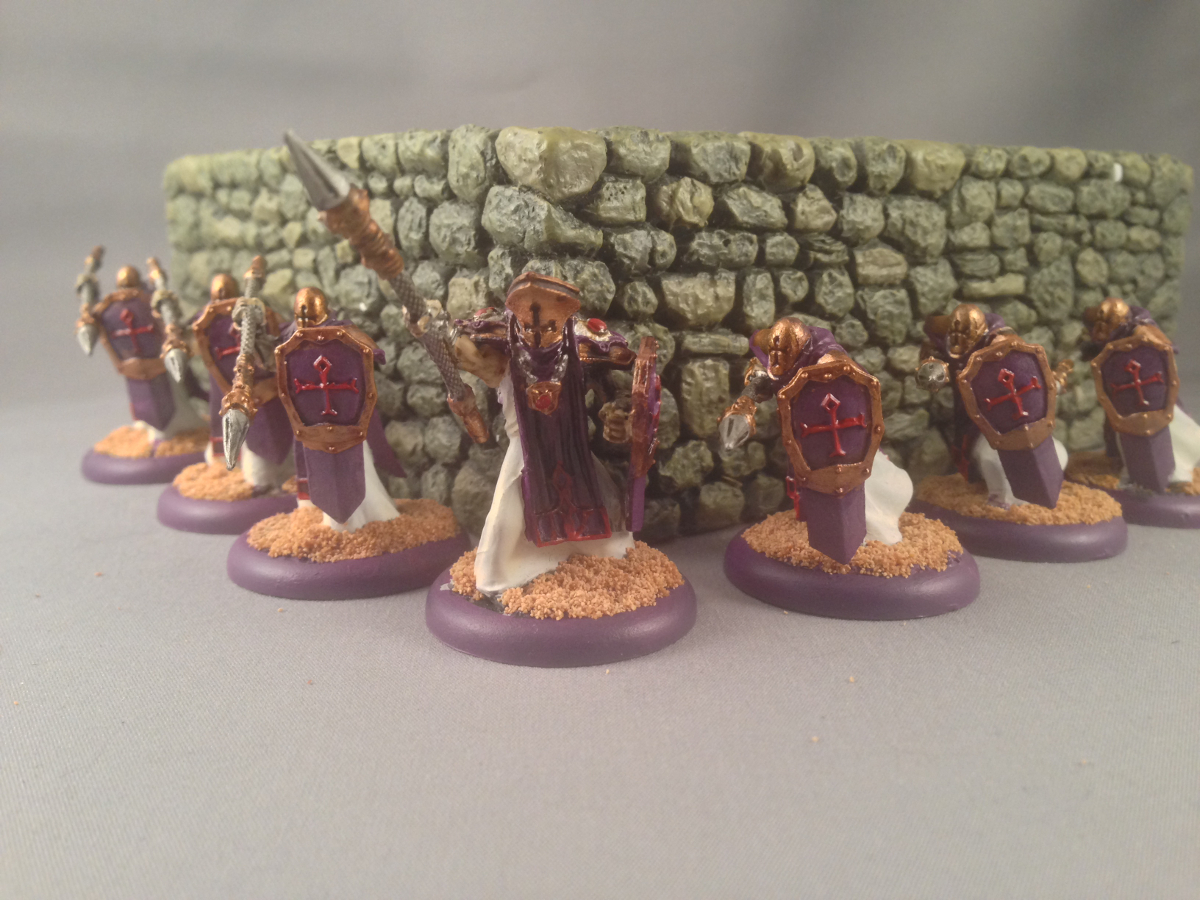
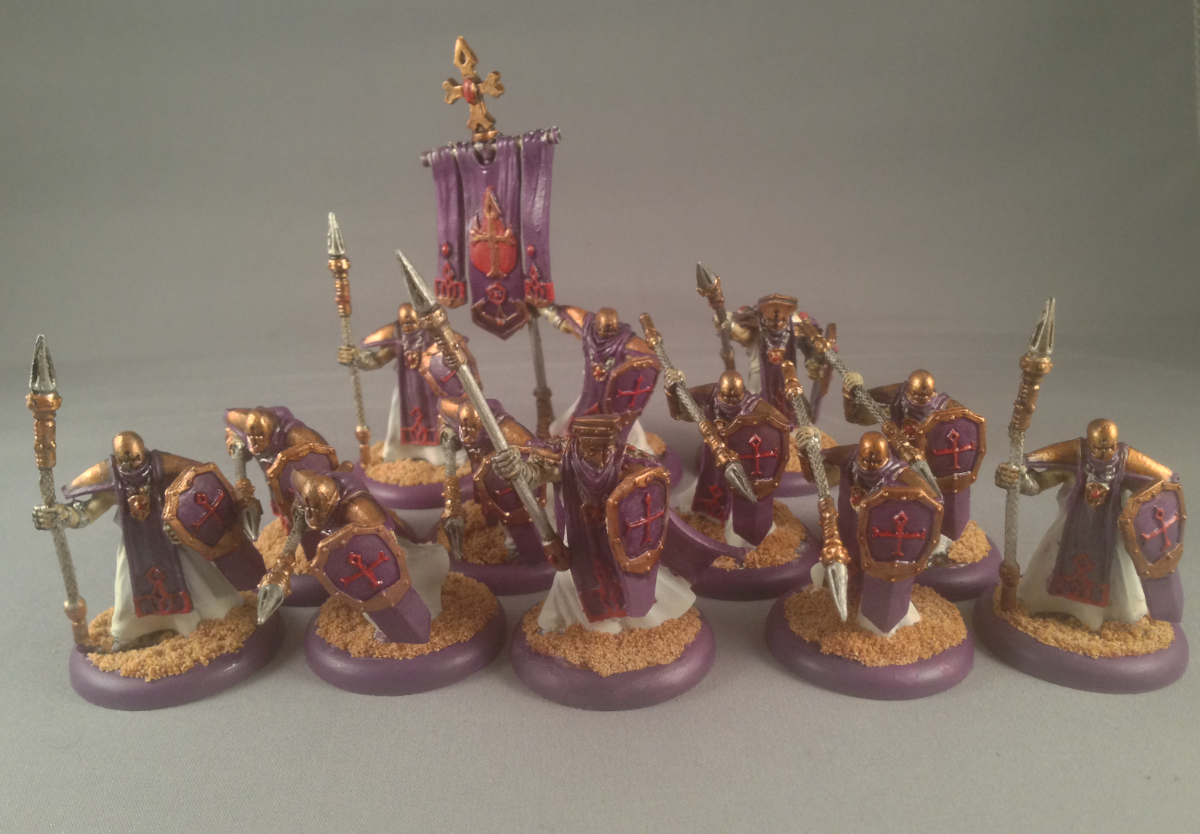
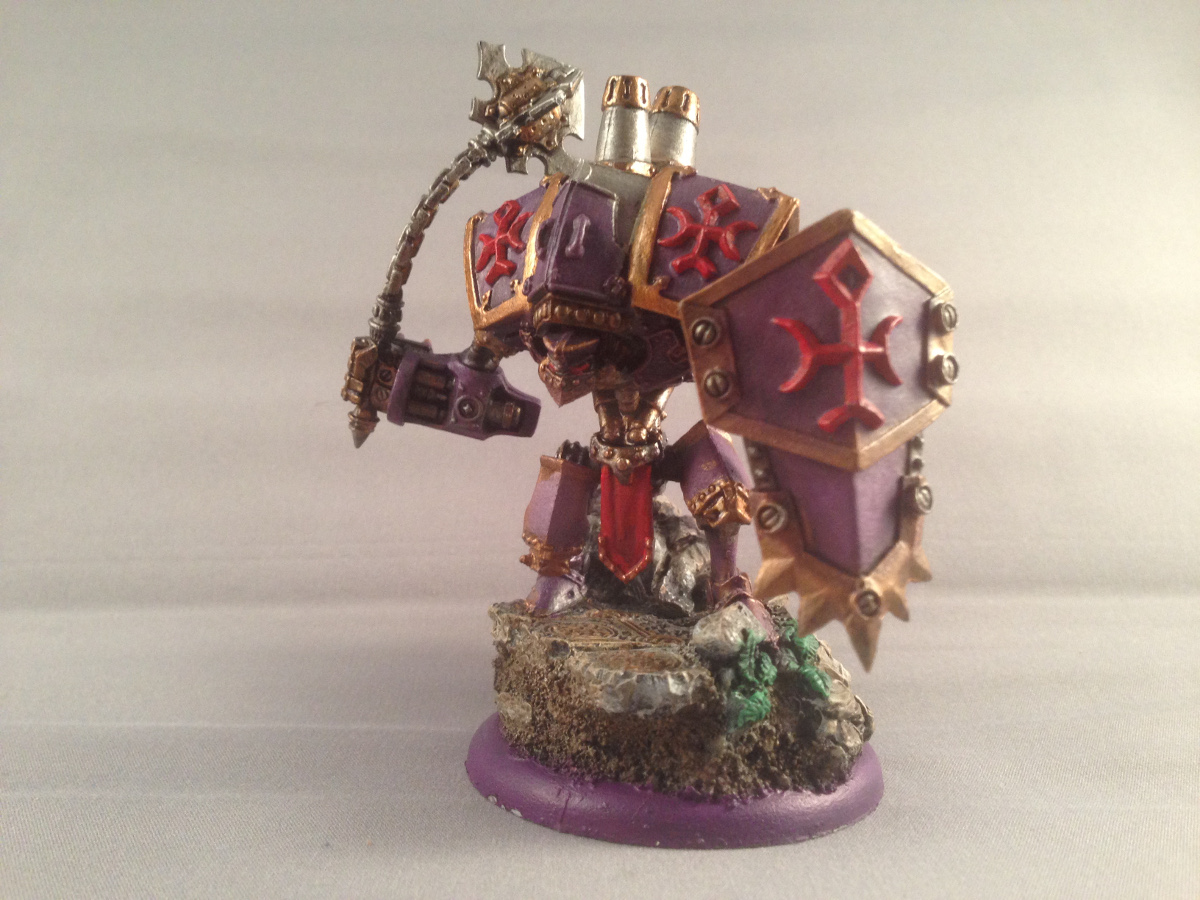
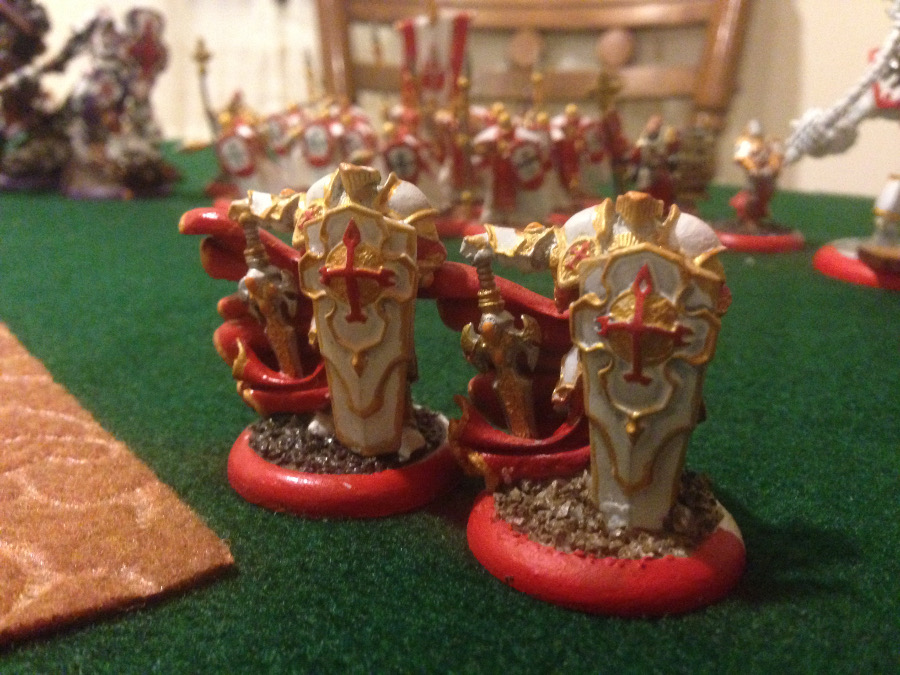
Plus I have a disproportionate love for Paladins of the Order of the Wall:


So, I decided to table my Tier 4 Durst list:
Tier 4, Defenders of the Wall
Anson Durst, Rock of the Faith
- Templar
- Templar
- Templar
High Paladin Dartan Vilmon
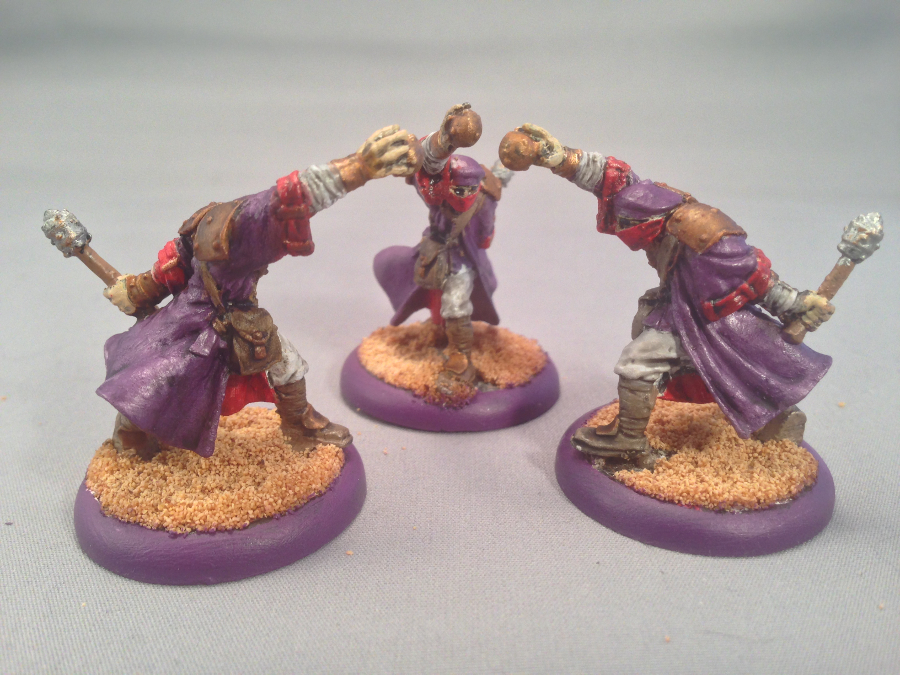
Paladin of the Order of the Wall
Vassal of Menoth
Vassal of Menoth
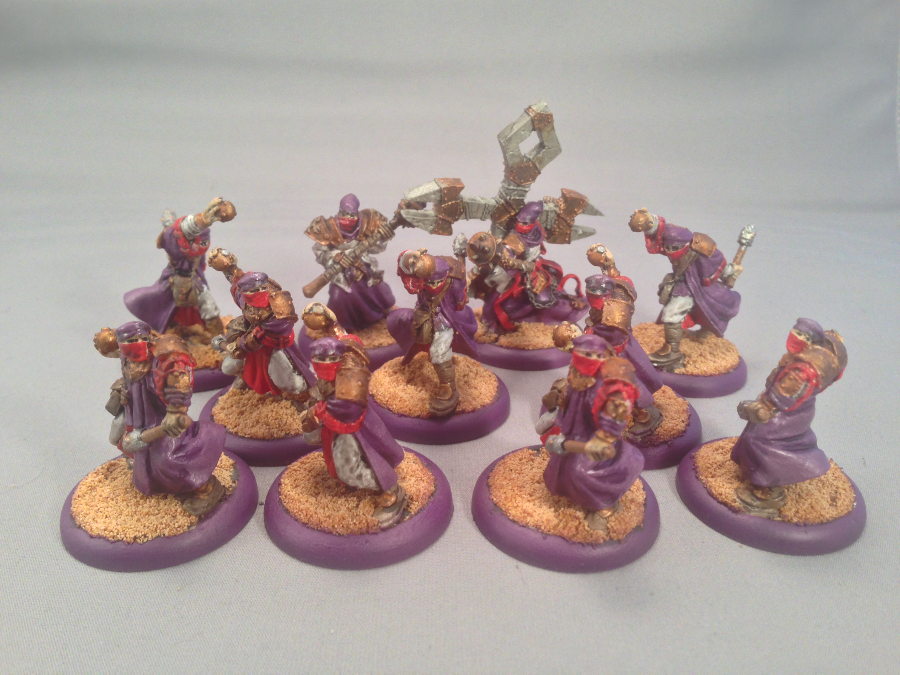
Choir of Menoth (max)
Temple Flameguard (max)
- Temple Flameguard Officer & Standard
Temple Flameguard (max)
- Temple Flameguard Officer & Standard


My opponent (Shamrod) came at me with Siege and a pile of fun stuff for him:
Major Markus "Siege" Brisbane
- Squire
- Stormwall and Pods
Reinholdt
Journeyman Warcaster
Stormsmith Stormcaller
Eiryss, Angel of Retribution
Rangers
Arcane Tempest Gun Mage Pistoleers
- Officer
Greygore Boomhowler & Co.
- Captain Jonas Murdoch


The scenario was Incursion. Cygnar won initiative and elected to go first. Protectorate selected the side of the table with a hill and a trench.
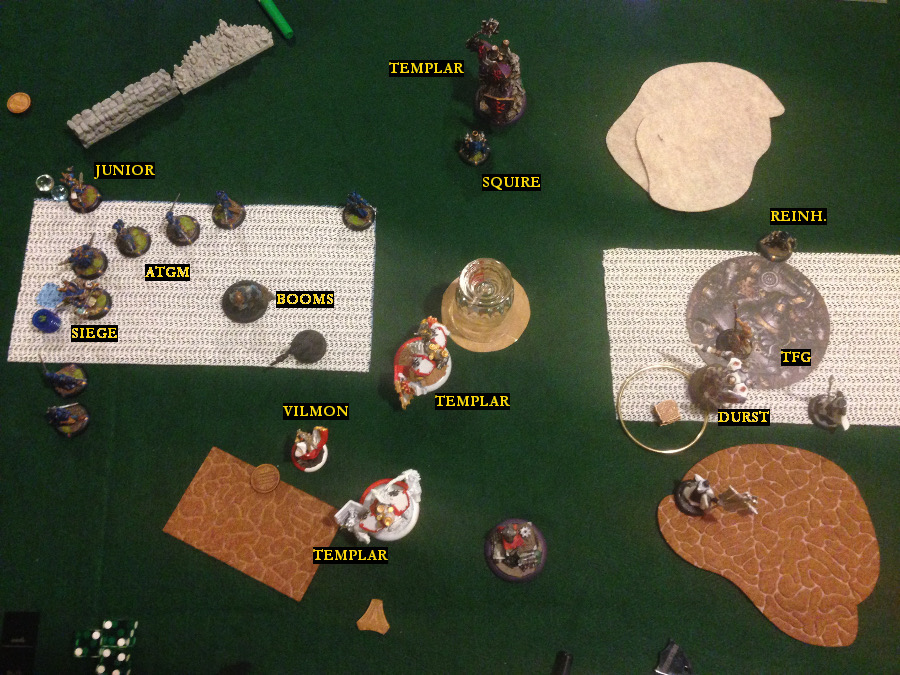

DEPLOYMENT


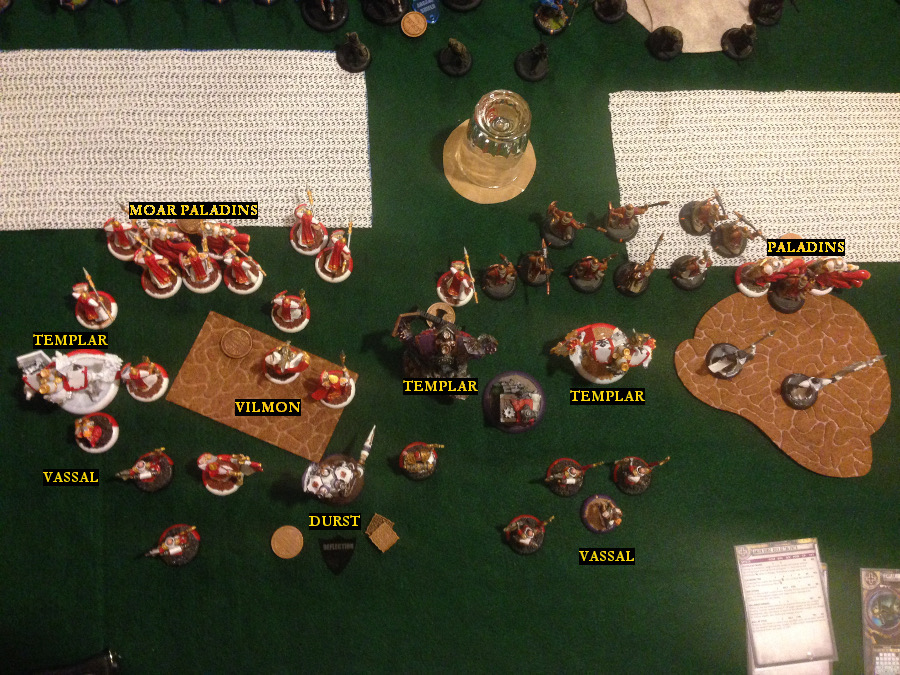
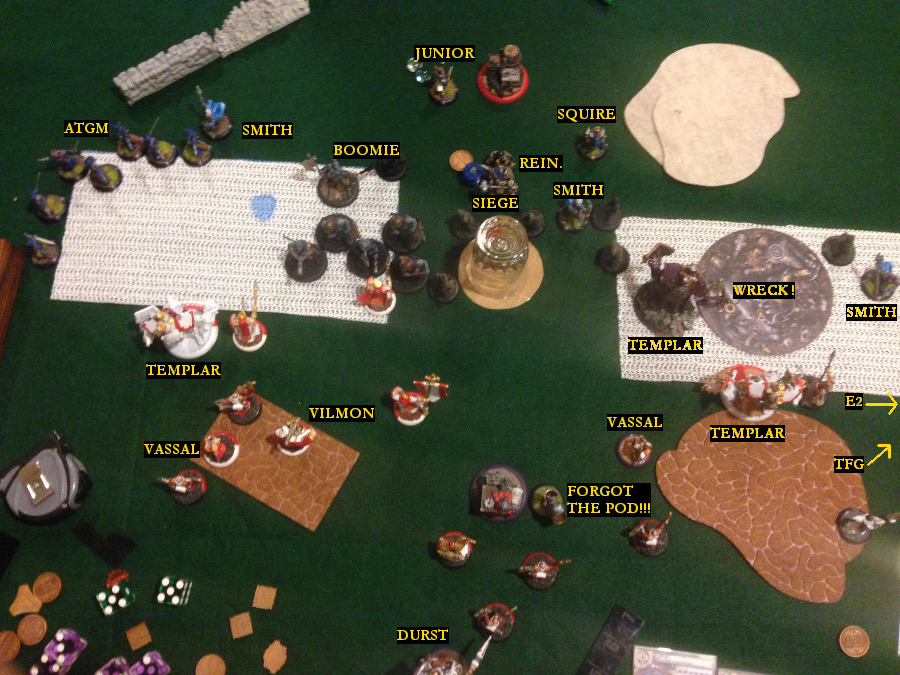
The Stormwall was placed across from Cygnar's enemy zone. Boomhowler took the center, the Gun Mages lined up across from the friendly zone. Siege centered himself on the battlefield. [the picture isn't great]


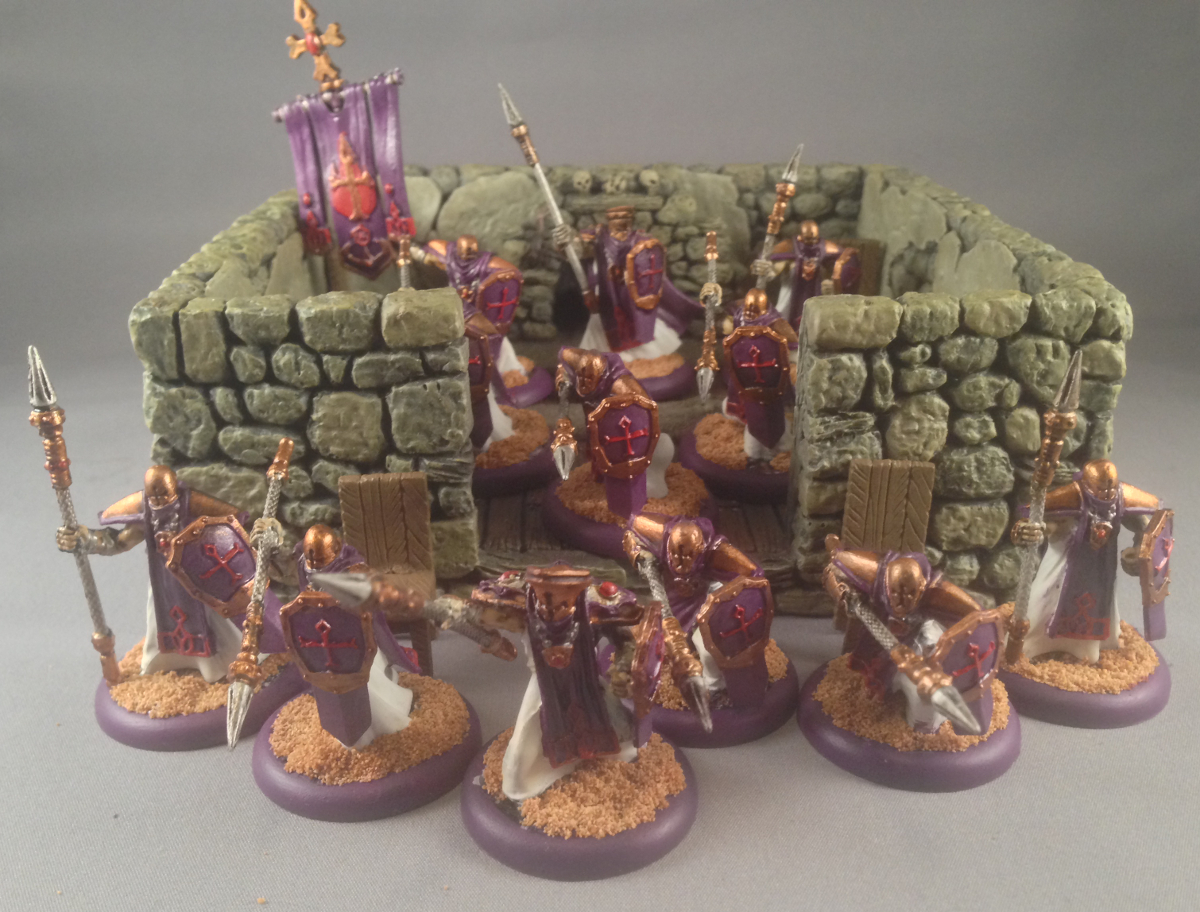
Protectorate dropped a pair of Paladins on each side, lined up a unit of TFG across from each zone, had Durst take up a position slightly left of center, and gave him two Templars. The third Templar lined up opposite the enemy zone. The Tier grants Paladins Advance Move and gives all of my Templars a free focus on the first turn.


.


TURN 1: CYGNAR


Everything runs. No surprise here. Stormwall comes charging up the field. Protectorate has zero guns on his side. Siege even gets in on the action.


TURN 1: PROTECTORATE


Almost everything runs. The Paladins advance and Stone & Mortar Stance because there are so many magical weapons on the other side that +5 Armor seems to be the better move. First mistake of the game, the TFG elect not to mini-feat. In retrospect, considering the feat, a defensive mini-feat is probably a good idea. Durst casts Deflection and Hallowed Avenger as well as sliding into his Rampart Guardian Stance. The Choir chant No Spells on the Jacks. My main focus on positioning was trying to mitigate all the Thunderbolt pushing, I figured ARM 21 would probably keep me safe all game. I should have baited out the feat with the TFG and saved the Paladins for after the feat was gone. Instead, I offered up just under half of my army to Siege.


TURN 2: CYGNAR


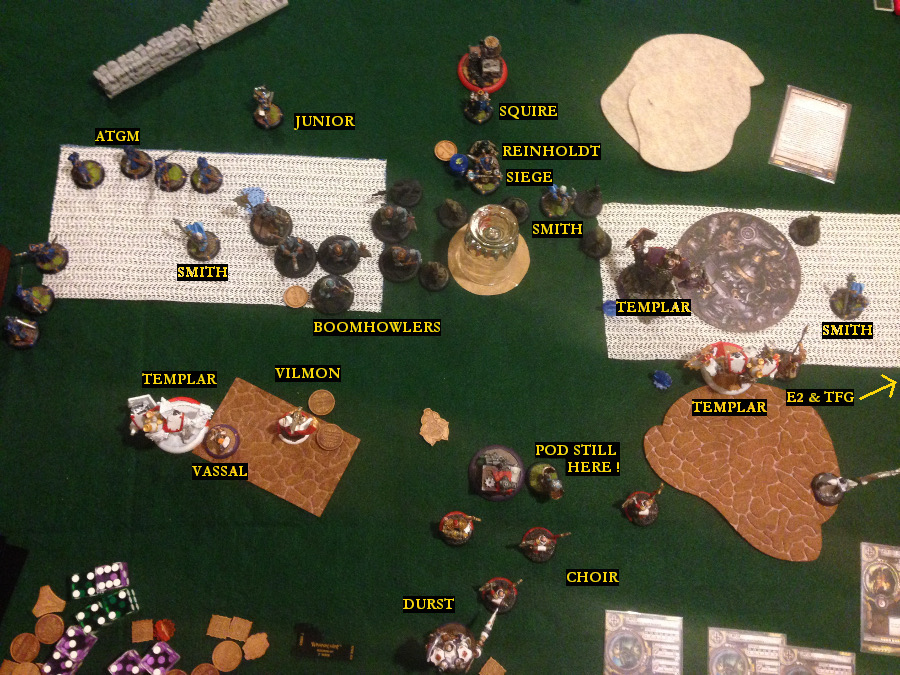
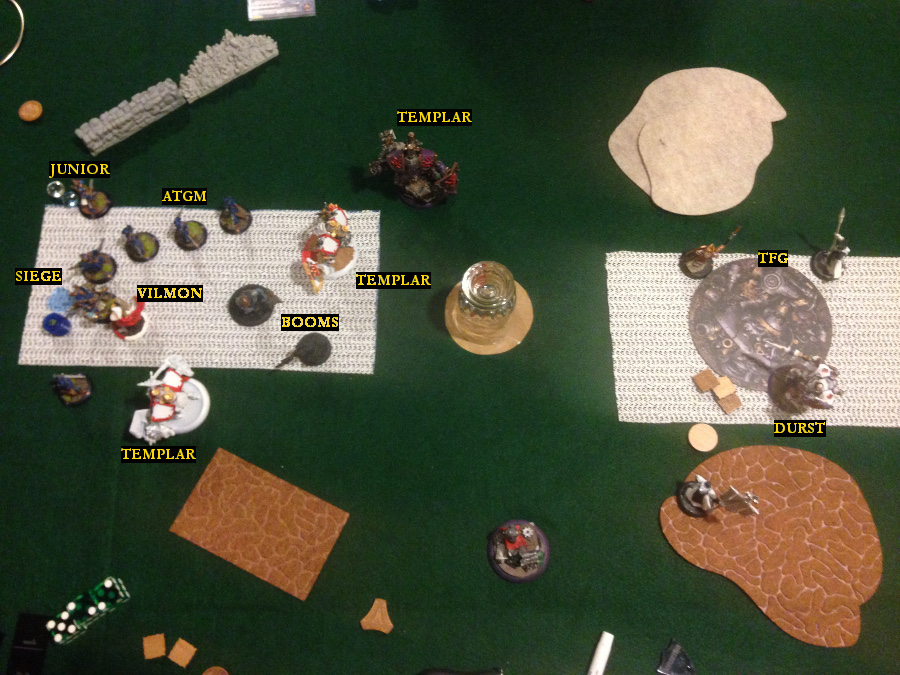
Surprise, surprise. Feat turn for Siege. He catches most of the Protectorate army under his control thanks to the Squire. The Stormwall rolls garbage dice, however five attack later, it has splatted 2 Paladins. The Pod disrupts a Templar and zaps a TFG dead. For some wonderful reason the Pod counts as a Stormcaller for Triangulation and Shamrod manages to drop two Triangulations into my TFG ranks. Combined with ATGM attacks, by the end of the turn There are six out of 24 TFG still alive - the UA + Leader. The only ruts in the road for Cygnar was that Eiryss botched her attack roll and the Rangers fail their command check from engaging the TFG. Also, Shamrod killed so many Protectorate troops that there were plenty of lanes to get at his Stormwall. Hallowed Avenger was useless because the only "attacks" that qualified for it happened before all the non-attacks. There was nowhere for the Templar to go. From the picture below, it looks like Cygnar has a firm grip on the zones.


TURN 2: PROTECTORATE


The Stormwall has to go. It is the absolute number 1 priority. That thing gives Cygnar so many options and the last thing I want is for Siege to pack up, back up and spend the rest of the game feeding the Stormwall focus. One Templar is disrupted but is next to the Fuel Cache Objective. The other Templar is a bit further out and will almost definitely need a Boundless Charge. The plan for the left side of the equation is to accept the jam and just see what can be smashed. When in doubt, attrition. Oh and this turn both TFG mini-feat.


The right side TFG charge, one into Eiryss (miss) and one into the Stormwall (a scratch!!). The Choir puts out the Hymn of Battle and mostly tries to get out of the way. Mistake #2: I completely forgot about the Pod!! The disrupted Templar free charges into the Stormwall and manages two moderately ok attacks. Durst activates and backs up after casting Boundless Charge on the loaded Templar. The loaded Templar smashes into the Stormwall and after five attacks comes up about 3 boxes short (one of the damage rolls was well under par). This is very bad. But wait! I had planned for this. All the Choir got out of the way so the Vassal could advance and Ancillary Attack a Templar. Bam. The Stormwall is a wreck!


On the left side, the TFG and the other Templar (and another Ancillary Attack) manage to take out four Boomhowlers and leave 1 on fire. Vilmon stays put in the trench under double stance.


TURN 3: CYGNAR


Forgetting the Pod meas more Triangulations and two disrupted Templars. Between that and the AGTM pushing the left Templar around, Cygnar manages to clear the zone although the mini-feated TFG prove to be sticky enough to require many attacks to do so. Unfortunately, Siege forgets to preemptively move into the zone. Eiryss is engaged and whiffs. The Rangers fail to rally. (At this point we were both looking askance at Shamrod's dice.) The hero of the fight against the Stormwall (the Vassal) is blown apart by Siege. Cygnar's hold on his enemy zone is wavering, although he has a Ranger, Stormsmith, and Eiryss inside it. His friendly zone is clear, but he isn't doing any damage to the Templar (just pushing it around).


TURN 3: PROTECTORATE


Ok. Those Stormsmiths have to go. There is just too much disruption on the table. Also, I need to start clearing a zone if I want to get anywhere because now Siege is just camping a ridiculous amount of focus. Fortunately I have made it to Turn 3 without needing to Feat. That means it is time for a solid Durst Feat turn. The left side Templar gets fully loaded. The closest Templar to the Pod backs up and smashes it. I use the BeatBack to reposition forward slightly. The Choir run around trying to get out of the way. I don't have any good way to reach more than the Templar on the left, but that is going to force the entire unit to shift hard in that direction. Oh well. Mistake #3: I leave a bunch of Choir just out in the open. Durst charges far off target to go Base to Base with a Templar. The loaded Templar goes to town on Boomhowler himself and the Stormsmith on that side. After pasting the Stormsmith, It takes all the remaining attacks to finally get Boomhowler to fail a tough check. Vilmon and Vassal button up with the Templar. Vilmon drops a Boomhowler, but it toughs. The Vassal Ancillary Attacks the Templar who hits another Boomhowler, but that one toughs as well. The TFG Leader and Officer Combine Melee and manage to kill Eiryss2. The forward Templar waddles forward and pastes another Stormsmith. If I had been able to reach the lead Templar, No Spelling it, instead of Battling the other, would have been really cool.


TURN 4: CYGNAR


With the Feat up and my important pieces bunkered into Templars, all the AGTM and Siege can do is take out whatever Choir I left in the breeze. They do manage to kill the Choir leader in the trench. By the end of the turn, I have one Choir member left. Siege also manages to Force Hammer the forward Templar. He knocks it back into a Ranger which gets turned into jelly. Maybe this is what snaps them back into focus, because the Rangers manage to rally. All the Boomhowlers manage to do is stand up. Siege gets into the zone by the end of his activation.


TURN 4: PROTECTORATE


I have big plans for this turn, but I have a small focus issue. I need to allocate enough to the lead Templar to give it up and into the Objective, but I can't afford to overcommit. I want to put Durst deep into the flank of the zone. I need the Stormsmith dead. On the other side, I need to keep the ATGM and the Boomhowlers tied up working on that Templar. I don't have a ton of models on the table, but three Templars is still three really heavy jacks. The goal is to contest as hard as I can and move towards a scenario victory.


Durst puts one focus on the center Templar, two focus on the lead Templar, one is used to shake Knockdown. The TFG manage to kill the Stormsmith, and position themselves in such a way that Durst can charge them to extra distance. The Choir can't reach the lead Templar, so he moves into the Zone and Battles the center Templar. That Templar charges a Ranger, smashes it, moves forward with a BeatBack, hammers a second with the shield, then buys an attack to crush a third Ranger and BeatBack backwards to cover the path towards the zone.


Mistake #4 … Durst needs to cast Boundless Charge on the lead Templar … therefore he can't fail a charge. He has to opt to advance into the Zone, cast Boundless Charge on the Templar, and Rampart Stance camping 1. The lead Templar charges the Objective for free (Boundless Charge) and rolls GARBAGE on damage. After three attacks the objective is left at 2. This is the Templar that almost gets it done all game. Almost on the Stormwall, almost on the Objective. Whelp. The only other thing I can do is attempt to Arcane Bolt it with the Vassal. The Bolt hits but fails to break armor. Le Sigh. Vilmon and the left Templar successfully murder two Boomhowlers, but the third makes a tough check. At least that will gum up any sort of Assault. Durst manages to score a Control Point.


SCORE: CYGNAR 0, PROTECTORATE 1


TURN 5: CYGNAR


Siege charges Vilmon and misses on the swing. He buys an attack but fails to break armor and then decides to stop attacking. Rangers run to contest zone. The second Vassal killed by ATGM who then proceed to push the Templar out of the zone. Some of them scratch up the Objective. Arcane shield gets swapped to Siege.


SCORE: CYGNAR 0, PROTECTORATE 1
.


TURN 5: PROTECTORATE


The goal here is to clear the zone and grind down as much of the rest of the Cygnar forces as I can while still giving Siege a clear and present danger to consider. So far, Shamrod has not been able to free up his ATGM to come across the field and cause trouble on the other side. In a previous game we played, he was able to use Thunderbolt to deny me access to a zone late game and he won as a result. I need to get ahead far enough that he won't be able to manage to do that again.


The left Templar kills the two Boomhowlers engaging him. Sadly, sort of unsurprisingly at this point, the Boomhowlers fail command. Durst advances and blows up Rangers contesting the zone to clear it. Since the Gunmages have Truesight, Durst casts Deflection (the Cloud isn't going to help him). Durst in melee is so much fun, but you have to earn it by playing a tight opening game. The lead Templar smashes the Objective and follows-up by trying to remove the Squire (Dice off 3 and it gets left on 1). The Choir sings No Spells on central Templar who runs around the obstacle to contest zone. Vilmon swings at Siege but doesn't break armor (Dice off 10). Vilmon is not moving so he can stance up to 21 Armor. The Objective is gone and Durst dominates his Zone giving the Protectorate forces two more Control Points.


SCORE: CYGNAR 0, PROTECTORATE 3


TURN 6: CYGNAR


The ATGM push Vilmon and the Templar out of the Zone in a hilarious series of slightly differently angled shots such that he gets moved something like seven inches but is only 2.5 inches away from the zone. One of them shoots the last Choir member, Deflection doesn't save anyone today. Reinholdt runs to contest. Siege backs up to the edge of the zone. Junior moves to the back of the zone as well. Poor Boomhowlers fail to rally. However, Cygnar has managed to clear the Zone and score a Control Point.


SCORE: CYGNAR 1, PROTECTORATE 3


TURN 6: PROTECTORATE


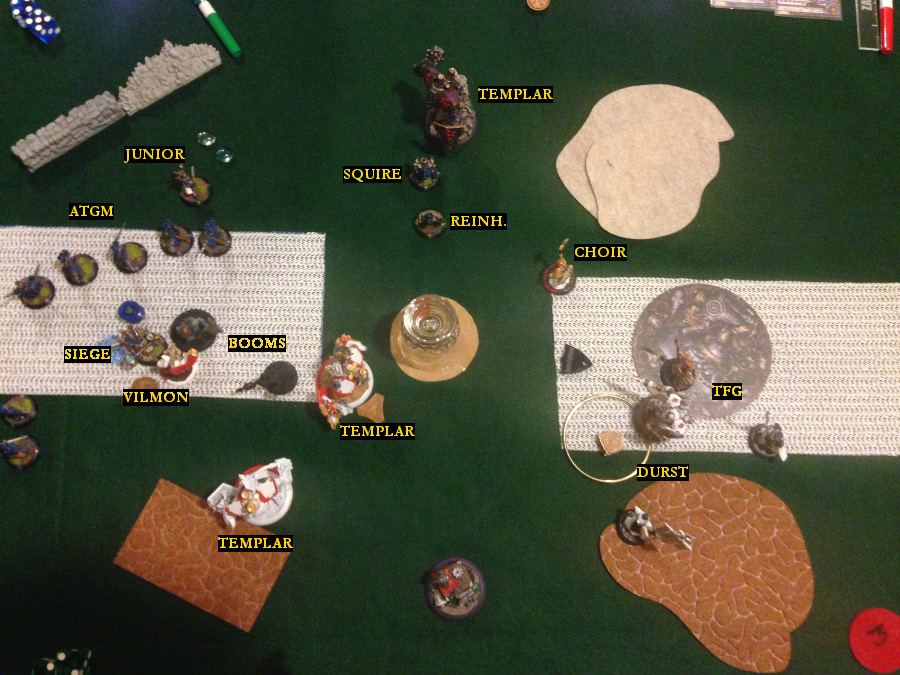
Look at that picture up above. That straight line from Vilmon to Siege is so tasty. All the Thunderbolts pushed the Templar into Durst's Control (it also pushed Vilmon into Deflection). Durst hands out some focus. Vilmon charges Siege and manages to deal ten points of damage even at Dice off eleven. The Templars smash everything on the near side of the Zone to prevent anything from running to contest. The TFG (supertroopers at this point in the battle) engage Reinholdt, he fails command … of course he does, and then he dies to the flaming spears of the Temple Flameguard. Durst backs up to take any sort of Hail Mary assassination off the table. Durst scores the fourth Control Point for Protectorate.


SCORE: CYGNAR 1, PROTECTORATE 4


TURN 7: CYGNAR


Unable to run anything into the far zone, Cygnar concedes the battle to Protectorate.

SCORE: CYGNAR 1, PROTECTORATE 5


Victory for Menoth!!


This game was a blast. We played on the clock, but Shamrod and I play a 90 minute clock instead of a 60. That way we won't accidentally play a four hour game, there is still some time pressure, but we can focus on having a good time. Both of us dislike games that go to time, but we both see the need to have some time element in play. Overall, it was a good back and forth. The opening salvo from Siege was almost enough to break my forces (or at least it felt that way). The Templars really shine with Durst and I even managed to run the list ok without any focus assistance. Shamrod's dice were … below average when he really needed to roll high and above average when he needed to roll low. Even with the ups and downs of dice, he still managed to push me pretty hard. Thanks for the game, Shamrod!


Thursday, November 5, 2015

Super Mario Maker meets Dungeons & Dragons


"If you have time on your dance card, I built you a prison."


That was the message Griffin McElroy sent Patrick Klepek in mid October. At the time, I didn't know anything about either Patrick or the game Super Mario Maker. However, Griffin McElroy is one of the funniest people on the planet and I am continually delighted by the things he creates. He is one of the three McElroy brothers on the widely loved My Brother, My Brother, and Me podcast. He is the Dungeon Master of The Adventure Zone podcast (featuring his father and his brothers as the players). He is also an editor at Polygon.com where, among many other things, he creates Monster Factory (also with his ridiculously funny brother Justin). In short, I will consume anything Griffin McElroy creates. But I had never heard of Super Mario Maker.


Super Mario Maker does what it says on the tin. It is a game level editor that gives the user the power to build interesting (or dull or impossible or fun) levels of Nintendo's Super Mario. And people have been making a lot of Mario levels since it's release. Patrick Klepek is a senior reporter at Kotaku and he streams on Twitch (which archives to his channel on YouTube). For the last few months, Patrick has spent his mornings before work streaming levels of Super Mario Maker in a series he calls Mario Maker Mornings. He is engaging and charismatic and complimentary to well-designed levels. In late September, Giant Bomb senior editor Dan Ryckert and friend of Patrick, fed Klepek a truly outrageous level dubbed "The Ryckoning". This was following a series of other challenging levels coming from the Giant Bomb region of the internet that Patrick also defeated.


The results were entertaining. But I came to that well after watching and re-watching Patrick attempt to decipher the monstrous prison constructed by Griffin. Watching Patrick twist and turn through a scenario that started at zero information beyond the known capabilities of Mario was fascinating. Since devouring the Hypercube episodes of Mario Maker Mornings, I have dipped deep into Klepek's archive. I watched all of The Ryckoning, I watched him work through the Giant Bomb levels. I have watched Patrick work through a ton of puzzles.


I like puzzles. I especially like puzzles in my twice monthly 5th edition D&D campaign. Currently the party (attendance waffles between 4 and 8) is working their way through C2: The Ghost Tower of Inverness. My campaign has blended themes and tropes I enjoy with 35 year old 1st edition modules. Previously, they have worked through a fast bastardization of L1: The Secret of Bone Hill (one of my favorites), the "good parts" of I1: Dwellers of the Forbidden City, the lower half of C1: The Hidden Shrine of Tamoachan, and have now found their way into the Ghost Tower. One of the hazards of uplifting ancient modules is a lack of puzzles, so I find ways to mix in things that interest me or currently have my attention. I also tend to drop campaign plot points and boss fights of my own design into the mix whenever it seems appropriate.


I have thrown puzzles at them inspired by my love of the Legend of Grimrock. I have hit them with encounter set pieces aping the Punisher battlefield in Heroes of the Storm (yes, they played a MOBA as D&D characters and it was awesome). The intersection in my mind of Griffin McElroy Dungeon Mastering a Super Mario Maker level somehow made total sense to me. In the most recent session of the campaign, I slipped a Mario puzzle into one of the blank spaces on the map.


In Super Mario Maker, a lot of the puzzles revolve around being Big Mario or Small Mario.


The method I used to put the puzzle together worked along the same mental pathways I use when I am designing text adventure puzzles. There is an ultimate goal which has requirements. Along the path to each of those requirements are sub-goals and sub-requirements and false trails. The primary constraints on the puzzle were:
  • It had to be fun for the players (eventually - some front-loaded frustration is ok)
  • It had to be solvable in about an hour of game play (we all have work in the morning)
  • It had to entertain around six players
  • It needed to use some Mario tropes like a climbing vine, a star, and big/small interactions
  • The internal rules had to be consistent (inconsistency leads players down the wrong track)


To hit that last point in more detail: Internal consistency means your players are going to formulate rules according to their observations, the knowledge of the game environment, and their knowledge of the bullshit their GM likes to throw at them. These can be incorrect rules and assumptions! Internal consistency which leads players down the "wrong" path toward incorrect conclusions are great. Especially if the clues to the correct path were there to be seen. Inconsistency, on the other hand, is going to lead to disengagement, random experimentation, and an overall sense of "just try whatever because there is no rhyme or reasons to this". When you are operating on a timed schedule (We try to wrap game by 10:30 PM), inconsistency is going to burn time you don't want burned.


The other thing I cherish in my puzzles is just enough deception and misdirection so that the players feel clever when they beat it. Fortunately, my players love puzzles. They love levers and switches and are willing to take risks for the pittance of treasure I give them (Sorry, folks, I'll get some more goods in there, I promise). When I sit down to put together a puzzle, I typically start with the very end and try to determine what the perfect route would be toward that end. Ok.  With all that background and sideground and meandering done, here was how my 5th Edition Super Mario Maker Puzzle Room played out.


In Super Mario Maker, a lot of the puzzles revolve around being Big Mario or Small Mario. Big Mario can take one hit before becoming Small Mario. If Small Mario is hit, he dies. I wanted passageways that took advantage of this and I wanted to use that effect to set the tone as quickly as possible. Therefore, the entrance corridor became "spiked" as a player crosses it. Everything around them expands to twice the normal size! (Everyone else sees that player become "Small". If a Small player takes another hit, they are reset to the entrance and lose 10% of their max health (irreducible) … if I wanted to, I reserved the right to make it unhealable until the puzzle was abandoned or solved.


Upon entering the room (about 50' by 50'), the players see a small raised dais in each corner, large enough to stand on and only a few inches off the floor. Every round a blue ball of light shoots down from the ceiling over each dais and "pops" on impact. Between each dais from floor to ceiling is a shimmering thin curtain of blue light.


Predictably, once several of the players entered the room (and all but one did), they start messing with the balls of light. The light proves harmless and mysterious. The balls are catchable. Once caught, new balls do not drop. A Perception check reveals a small block in the center of the ceiling out of place with the rest of the stone. Once all four balls have been caught, the block falls to the center of the floor, leaving a "Small" opening in the ceiling 50' above. However, on the block is a large animated vine monster with a snapping mouth for a head. Roll for initiative.


The Dragonborn crits the thing for something ridiculous. Viney "dies" and becomes a dead, heavy plant strewn about the floor like jumbled rope - still attached at its base to the block. Very mysterious. Close examination of the plant shows that the thick strand has lots of accessible purchase points for easy climbing. Except, of course, the thing is dead.


More experimentation with the balls of light. Some consideration of using a potion of flying to zoom up and slip through the hole in the ceiling. The concern about the reverse journey at a faster and uncontrolled rate sidelines that avenue of thought. The party tosses the balls of light clockwise through the blue curtains. Nothing happens. As it turns out I had five patterns and only needed three. Clockwise was one of the ones I tossed out at the end of the design process. Fortunately, they tried counterclockwise and a passageway opened in the wall nearby. The passageway looked safe, but it closed after a few seconds. It took the party a bit to realize they had to keep tossing the balls counterclockwise to maintain the opening. They did so and the Monk scurried down the small hallway into a room. There was some side talk of sealing the passage and leaving the Monk there. I love my players.


In the room with the Monk was a giant flugelhorn / pipe thing. Too large to fit back down the passage, but obviously meant to be blown. The Monk stepped up and blew out a few notes and ta-dah! The dead vine rose like a snake until it stretched from the block to the ceiling and through the small opening. By this point several of my players had keyed into the Mario tones. Currently, there was one player in the hall outside the puzzle room. There was a player blowing undead notes on a giant horn. Four players were playing catch, leaving one player available to act … the trap-springing, act-first, tried to kill him with a 10d20 lightning bolt trap a few sessions ago and he lived, fighter.


The Fighter climbs Viney and slips into the chamber above the room. He finds a lever behind a glass wall just after moving through the small hole. He fails his Perception check to notice the small mushroom sign near the lever. The vine continues for a short bit before stopping. Well above him is the dark end of an ominous pipe. Just above him and to the east and west is a "small" passage carpeted in spikes with a lever at each end, about 30ish feet away. The Fighter attempts to put down some armor over the spikes and crawl. He gets spiked and returns to the entrance. He comes in and tries again, with a shield. I say he brushes up against the wall accidentally and is returned to the beginning. He considers using a flying potion to slip down the hall. At this point (group Insight check) I let the players know that blowing that level of resources isn't going to be useful or wise (it wouldn't work, they would have felt cheated of the item, and time was going to be a factor if they started down that road).


This is where it almost went off the rails for me, because I had miscounted my player requirements.


In the room, the ball throwers switch back to clockwise. I decide to flip the effect I was reserving for east-west over to the clockwise to speed things along. The glass wall in front of the level disappears. The Fighter pulls the lever and a mushroom falls from the pipe overhead. It hits the Fighter and he becomes Big. He jumps up on the spikes heading east, the spikes turn him Small, and he runs over to the east lever, pulls it and runs back to the vine. How did he survive the spikes? Invincibility Frames. In Super Mario, when you are hit by an enemy, you have a few seconds of invincibility before another, deadly, hit can register. My players picked up on this rule instantly. The Fighter pulls the mushroom lever again. Uh oh! The east lever reset! He becomes big and runs over to the west lever anyway, but clearly a slightly different approach is needed.
No problem! The Cleric waiting outside makes his entrance, and scoots up the vine. This is where it almost went off the rails for me, because I had miscounted my player requirements. With six players, one player has to do the upstairs work. There isn't enough time with Invincibility Frames to get both levers with one player. With a seventh, suddenly they could both make a move at a lever. Fortunately, a piece of the puzzle just over the horizon saved my bacon. They both mushroomed, ran for the levers, pulled them, and then Stomp Blocks overhead smashed them into paste. A grinding, door-opening noise starts but then cuts out. (They reappear at the entrance down 10% of their max HP).


Use this one secret trick ... 

Somebody in the room says they should throw the balls across to each other instead of around in a circle and see what happens. Behold, they toss the balls north to south and back and another passage opens! Yes, the Monk is sealed in his little room, but he seems to be ok so far.  The Druid wonders what happens if they throw in an 'X' pattern, avoiding the blue curtains completely. !!! This was the super secret trick !!! But nothing visible happens. They hear something, but don't see anything. Mysterious. The party goes back to north-south pattern and the new path.


The new path is spiked! Very dangerous to enter, deadly if you are small. The Fighter climbs down the vine until he is just inside the room (just below the ceiling). The Cleric pulls the mushroom lever and gets out of the way. The mushroom falls through the hatch and hits the Fighter. Now he is Big inside the main room.


The Fighter runs down the new passage, getting spiked and becoming small. In the room is a pedestal with the Helmet. He took too long, and now his is trapped Small in the room. If he had run in, grabbed the Helmet and run out, he could have framed through the spike floor. Unwilling to take another death, the Fighter calls out for the 'X' pattern. The party complies. The spike passage closes, and a new, small, secret passage opens in the Helmet room. It is a safe path that leads to a small room with a potion. The Fighter collects the potion, walks into the Helmet room and calls for a clockwise exit.


The passage out opens and he drinks the potion. Suddenly his whole world is fast intense music and glowing star-like wonder! Without waiting around, the Fighter dashes into the main room and ascends the Vine (the poor Monk has been playing music this entire time). He runs east to the first lever, then west to the second lever. With both pulled the Stomp Blocks smash down and bounce off the Helmet. The grinding, door-opening noise turns into an actual large, safe passageway opening in the main room. Beyond is gleaming treasure and that is where the session ended for the night - the Super Mario Maker puzzle solved and the party eagerly awaiting the next session to discover the contents of the treasure room.


The session ran a bit long, but the players put together to puzzle without too much hand-wringing. The Druid's sudden inspiration to toss the balls in an 'X' short-cut the biggest false lead, and that is 100% fine in my book. I love it when players use their minds to cut corners off of my puzzles. If the party had encountered the room earlier in the evening, I might have done more to make the ball throwers have a harder time, like taking a point or two of damage on every toss or having some sort of chain chomp enemy harassing them into crazy stunts to keep the balls unbroken.


Thank you Patrick Klepek and Griffin McElroy for the wonderful inspiration to put this together. If you would like to watch any of the interesting bits I mentioned at the start of this article, you can find Griffin (@griffinmcelroy) here:


MBMBAM (My Brother, My Brother, and Me podcast)
The Adventure Zone podcast
Monster Factory

And you can find Patrick (@patrickklepek) here:


About Me

My photo
Geek - Gamer - Librarian - Writer. Only awesome at one of those things at a time, unfortunately.

About Fading Interest

After writing op-eds and travelogues for several years, after finishing a few books, and after failing to get the ball rolling with project after project I stumbled into an idea that might just hold my interest long enough to enjoy some level of satisfaction with my writing.