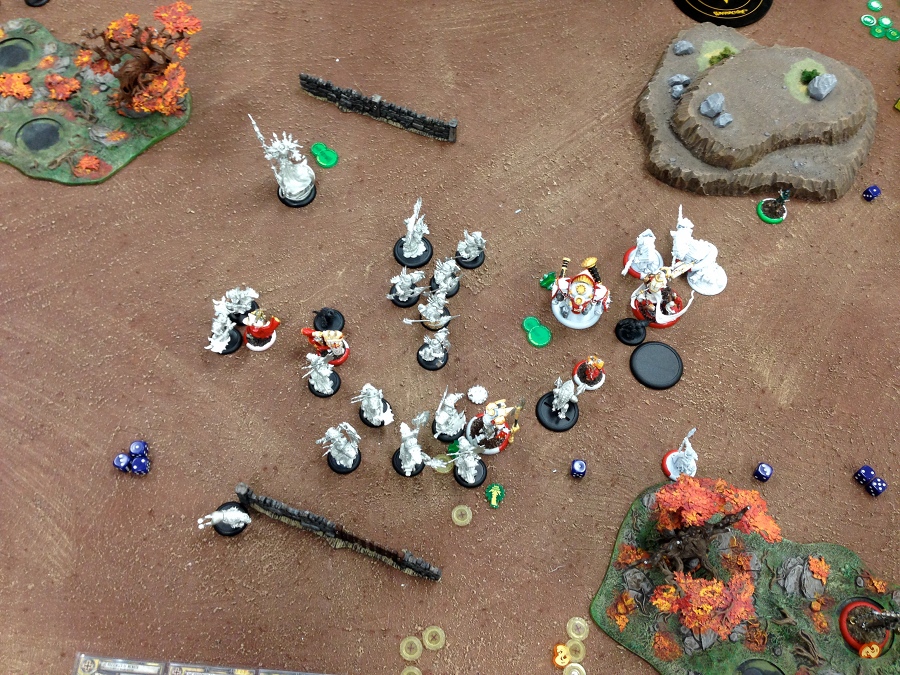
Anson Durst, Rock of the Faith vs. Major Markus "Siege" Brisbane
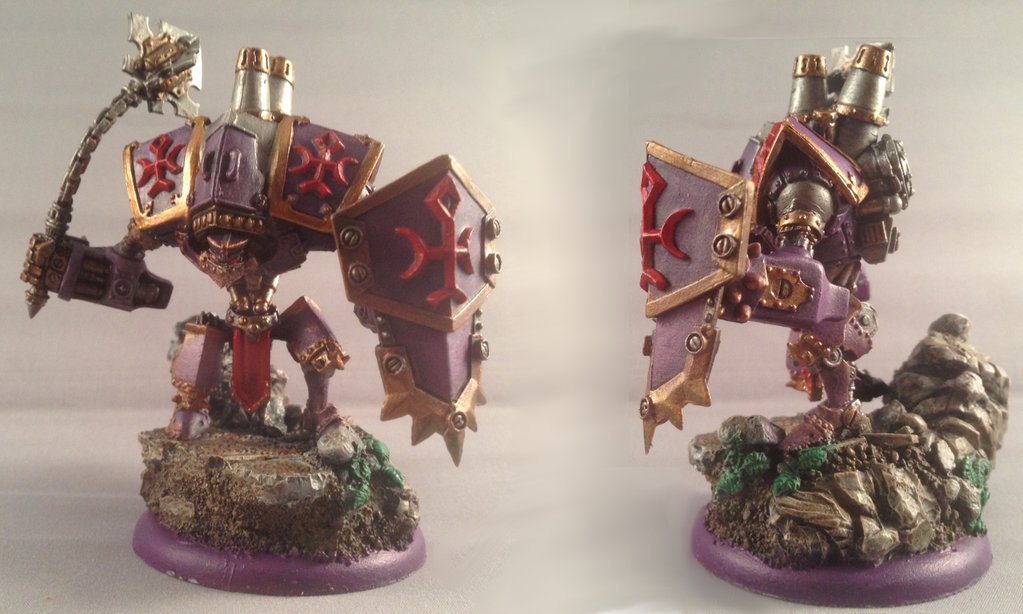
It was a "bring something you want to have fun playing" night. I had recently finished this guy for Durst and wanted to get him on the table:
Plus I have a disproportionate love for Paladins of the Order of the Wall:
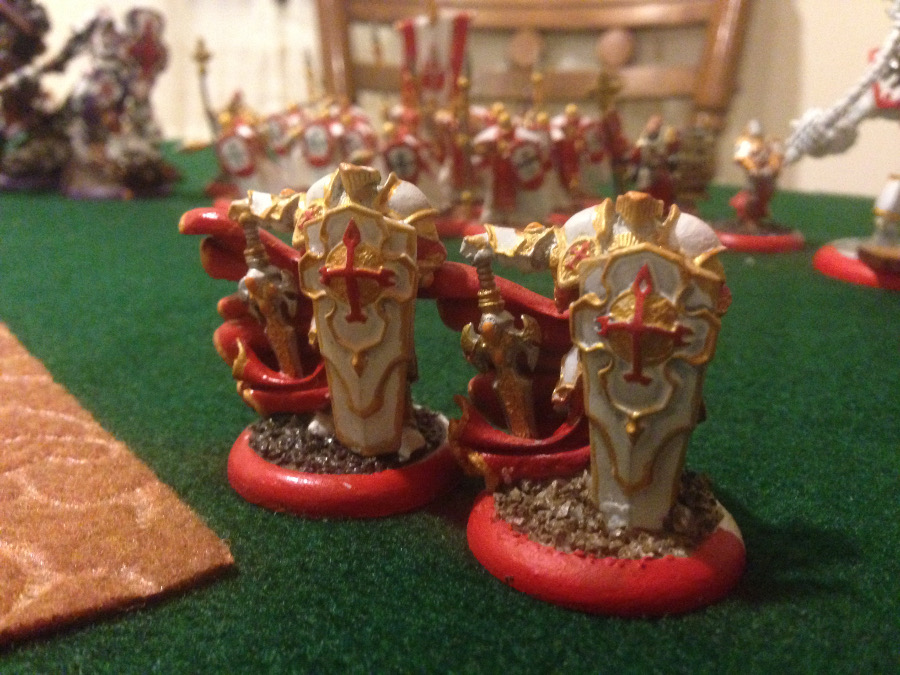
So, I decided to table my Tier 4 Durst list:
Tier 4, Defenders of the Wall
Anson Durst, Rock of the Faith
- Templar
- Templar
- Templar
High Paladin Dartan Vilmon
Paladin of the Order of the Wall
Paladin of the Order of the Wall
Paladin of the Order of the Wall
Paladin of the Order of the Wall
Vassal of Menoth
Vassal of Menoth
Choir of Menoth (max)
Temple Flameguard (max)
- Temple Flameguard Officer & Standard
Temple Flameguard (max)
- Temple Flameguard Officer & Standard
My opponent (Shamrod) came at me with Siege and a pile of fun stuff for him:
Major Markus "Siege" Brisbane
- Squire
- Stormwall and Pods
Reinholdt
Journeyman Warcaster
Stormsmith Stormcaller
Stormsmith Stormcaller
Stormsmith Stormcaller
Eiryss, Angel of Retribution
Rangers
Arcane Tempest Gun Mage Pistoleers
- Officer
Greygore Boomhowler & Co.
- Captain Jonas Murdoch
The scenario was Incursion. Cygnar won initiative and elected to go first. Protectorate selected the side of the table with a hill and a trench.
DEPLOYMENT
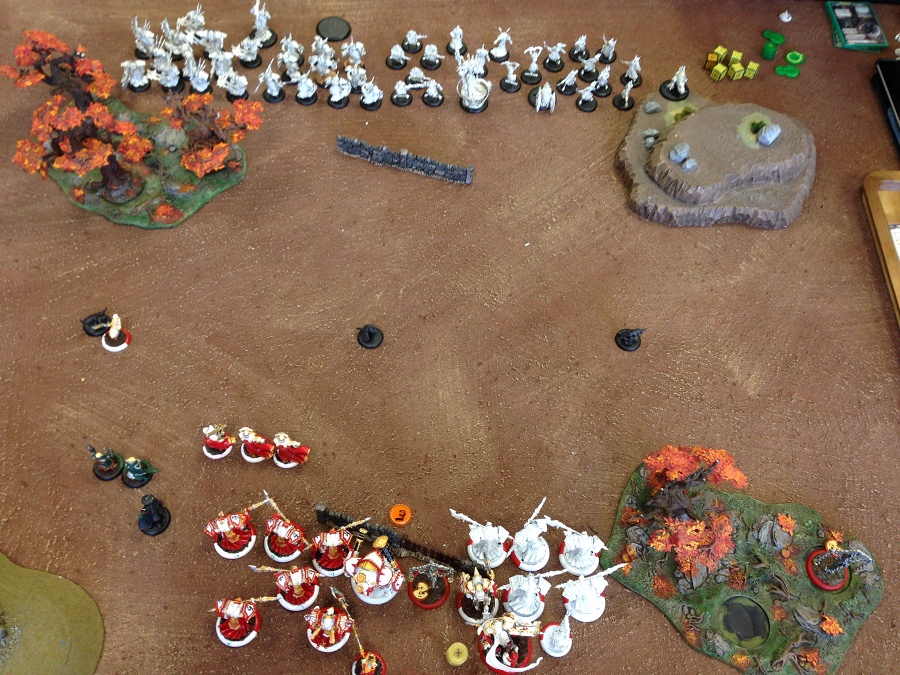
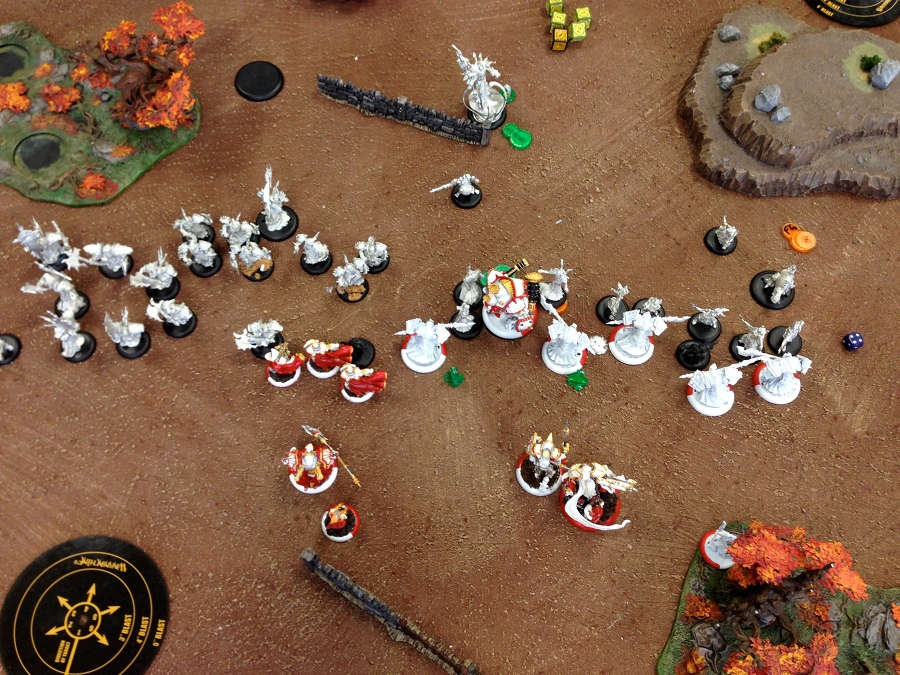
The Stormwall was placed across from Cygnar's enemy zone. Boomhowler took the center, the Gun Mages lined up across from the friendly zone. Siege centered himself on the battlefield. [the picture isn't great]
Protectorate dropped a pair of Paladins on each side, lined up a unit of TFG across from each zone, had Durst take up a position slightly left of center, and gave him two Templars. The third Templar lined up opposite the enemy zone. The Tier grants Paladins Advance Move and gives all of my Templars a free focus on the first turn.
.

TURN 1: CYGNAR
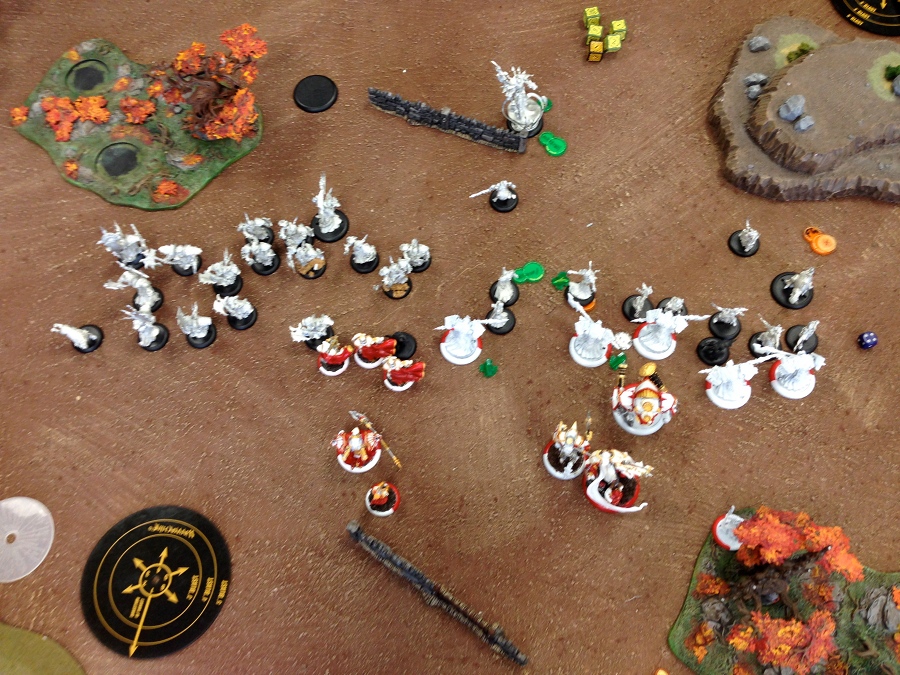
Everything runs. No surprise here. Stormwall comes charging up the field. Protectorate has zero guns on his side. Siege even gets in on the action.

TURN 1: PROTECTORATE
Almost everything runs. The Paladins advance and Stone & Mortar Stance because there are so many magical weapons on the other side that +5 Armor seems to be the better move. First mistake of the game, the TFG elect not to mini-feat. In retrospect, considering the feat, a defensive mini-feat is probably a good idea. Durst casts Deflection and Hallowed Avenger as well as sliding into his Rampart Guardian Stance. The Choir chant No Spells on the Jacks. My main focus on positioning was trying to mitigate all the Thunderbolt pushing, I figured ARM 21 would probably keep me safe all game. I should have baited out the feat with the TFG and saved the Paladins for after the feat was gone. Instead, I offered up just under half of my army to Siege.
TURN 2: CYGNAR
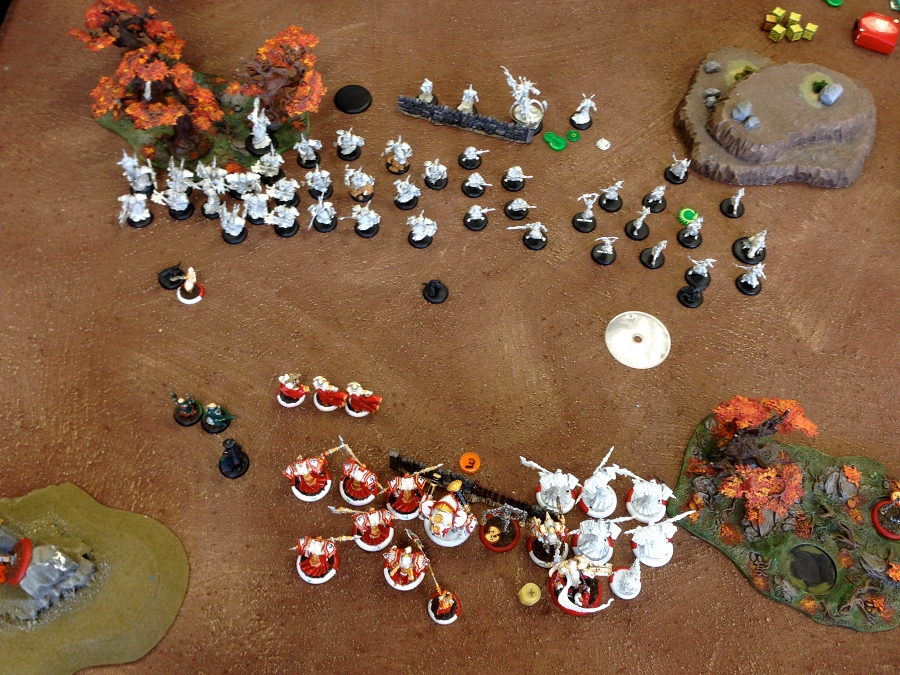
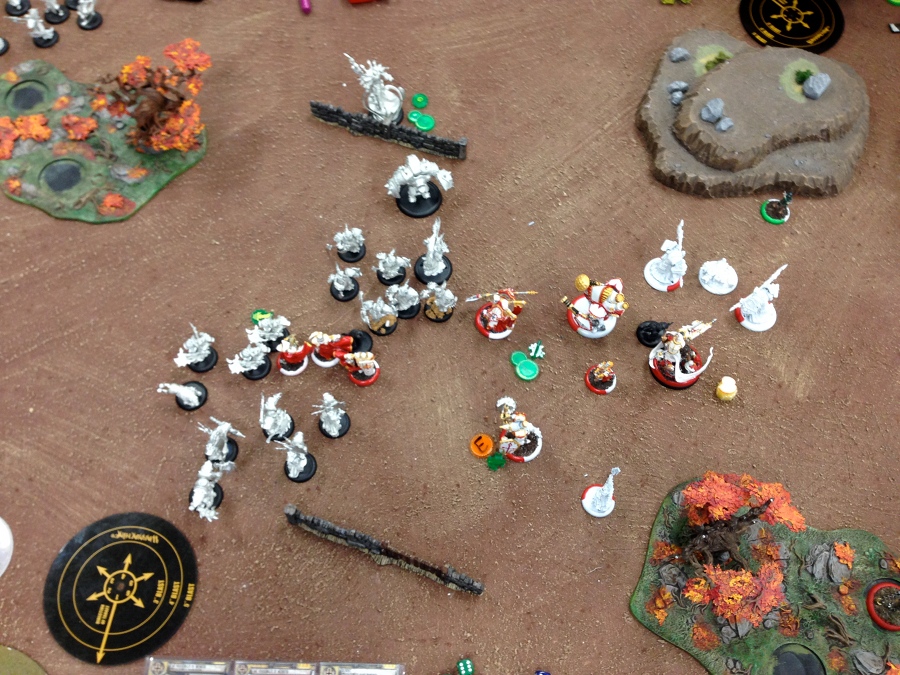
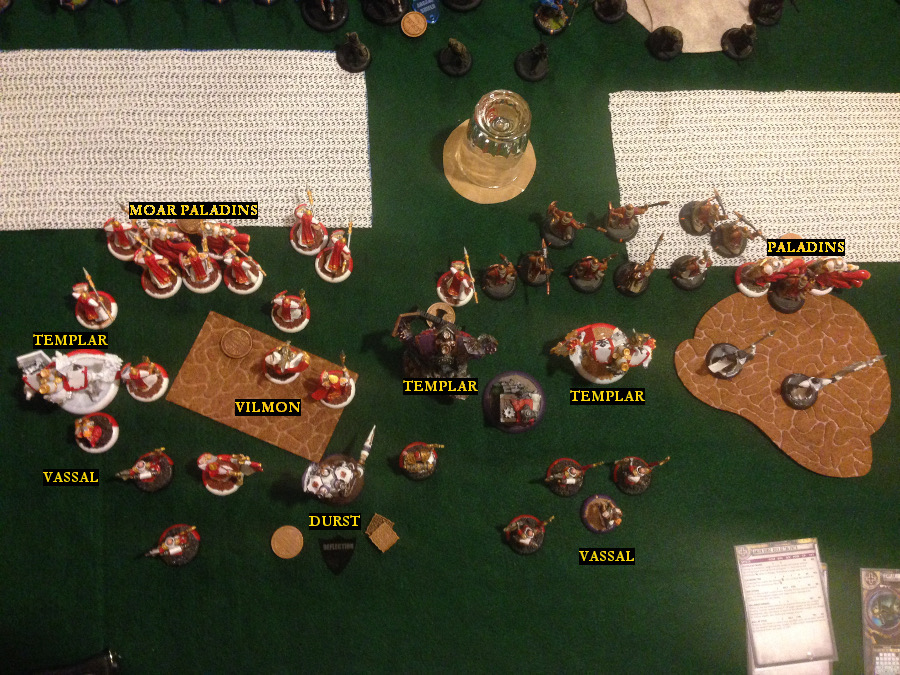
Surprise, surprise. Feat turn for Siege. He catches most of the Protectorate army under his control thanks to the Squire. The Stormwall rolls garbage dice, however five attack later, it has splatted 2 Paladins. The Pod disrupts a Templar and zaps a TFG dead. For some wonderful reason the Pod counts as a Stormcaller for Triangulation and Shamrod manages to drop two Triangulations into my TFG ranks. Combined with ATGM attacks, by the end of the turn There are six out of 24 TFG still alive - the UA + Leader. The only ruts in the road for Cygnar was that Eiryss botched her attack roll and the Rangers fail their command check from engaging the TFG. Also, Shamrod killed so many Protectorate troops that there were plenty of lanes to get at his Stormwall. Hallowed Avenger was useless because the only "attacks" that qualified for it happened before all the non-attacks. There was nowhere for the Templar to go. From the picture below, it looks like Cygnar has a firm grip on the zones.
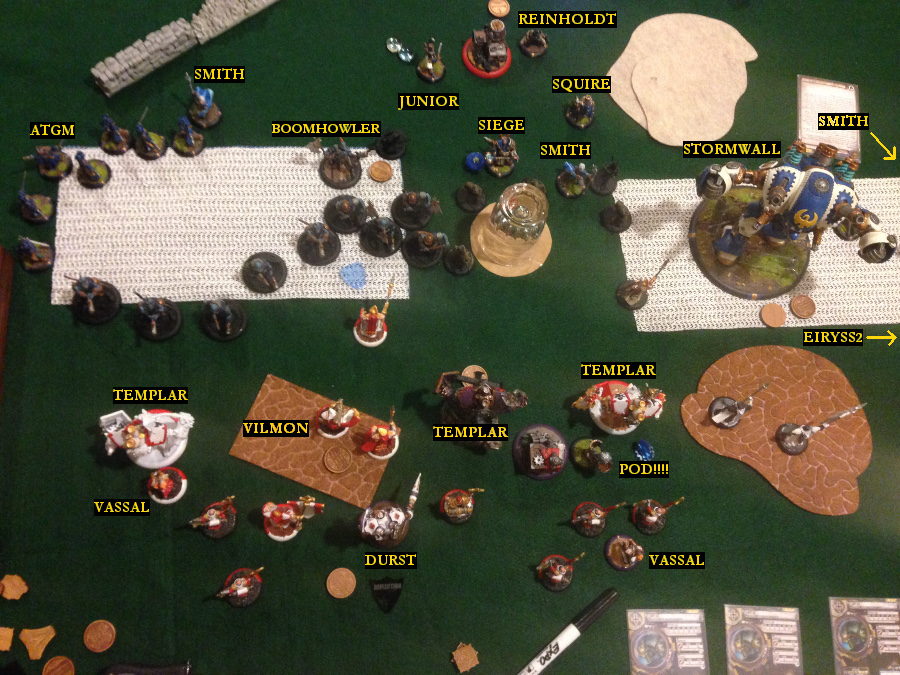
TURN 2: PROTECTORATE
The Stormwall has to go. It is the absolute number 1 priority. That thing gives Cygnar so many options and the last thing I want is for Siege to pack up, back up and spend the rest of the game feeding the Stormwall focus. One Templar is disrupted but is next to the Fuel Cache Objective. The other Templar is a bit further out and will almost definitely need a Boundless Charge. The plan for the left side of the equation is to accept the jam and just see what can be smashed. When in doubt, attrition. Oh and this turn both TFG mini-feat.
The right side TFG charge, one into Eiryss (miss) and one into the Stormwall (a scratch!!). The Choir puts out the Hymn of Battle and mostly tries to get out of the way. Mistake #2: I completely forgot about the Pod!! The disrupted Templar free charges into the Stormwall and manages two moderately ok attacks. Durst activates and backs up after casting Boundless Charge on the loaded Templar. The loaded Templar smashes into the Stormwall and after five attacks comes up about 3 boxes short (one of the damage rolls was well under par). This is very bad. But wait! I had planned for this. All the Choir got out of the way so the Vassal could advance and Ancillary Attack a Templar. Bam. The Stormwall is a wreck!
On the left side, the TFG and the other Templar (and another Ancillary Attack) manage to take out four Boomhowlers and leave 1 on fire. Vilmon stays put in the trench under double stance.
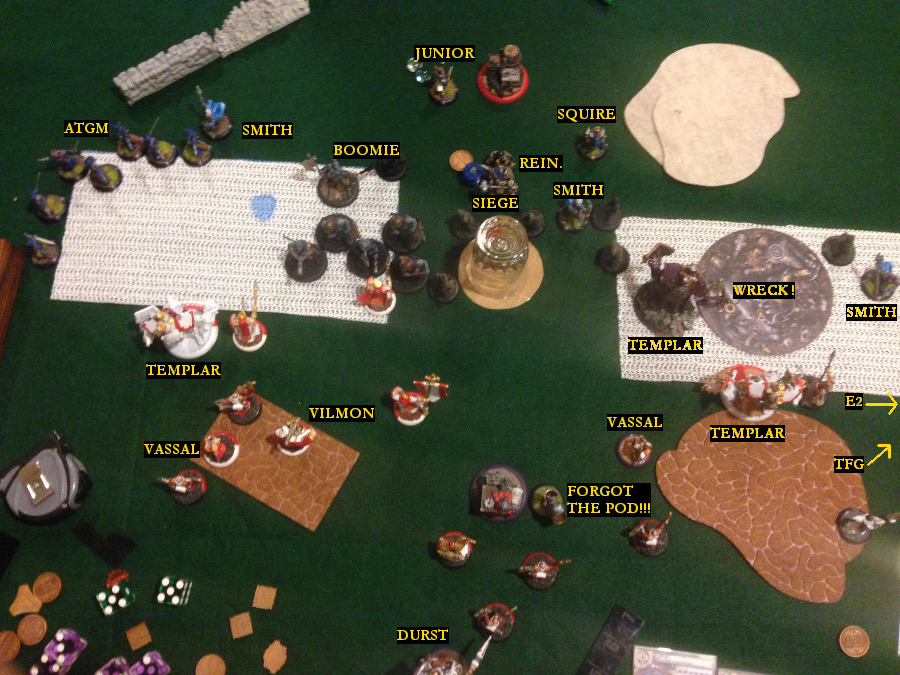
TURN 3: CYGNAR
Forgetting the Pod meas more Triangulations and two disrupted Templars. Between that and the AGTM pushing the left Templar around, Cygnar manages to clear the zone although the mini-feated TFG prove to be sticky enough to require many attacks to do so. Unfortunately, Siege forgets to preemptively move into the zone. Eiryss is engaged and whiffs. The Rangers fail to rally. (At this point we were both looking askance at Shamrod's dice.) The hero of the fight against the Stormwall (the Vassal) is blown apart by Siege. Cygnar's hold on his enemy zone is wavering, although he has a Ranger, Stormsmith, and Eiryss inside it. His friendly zone is clear, but he isn't doing any damage to the Templar (just pushing it around).
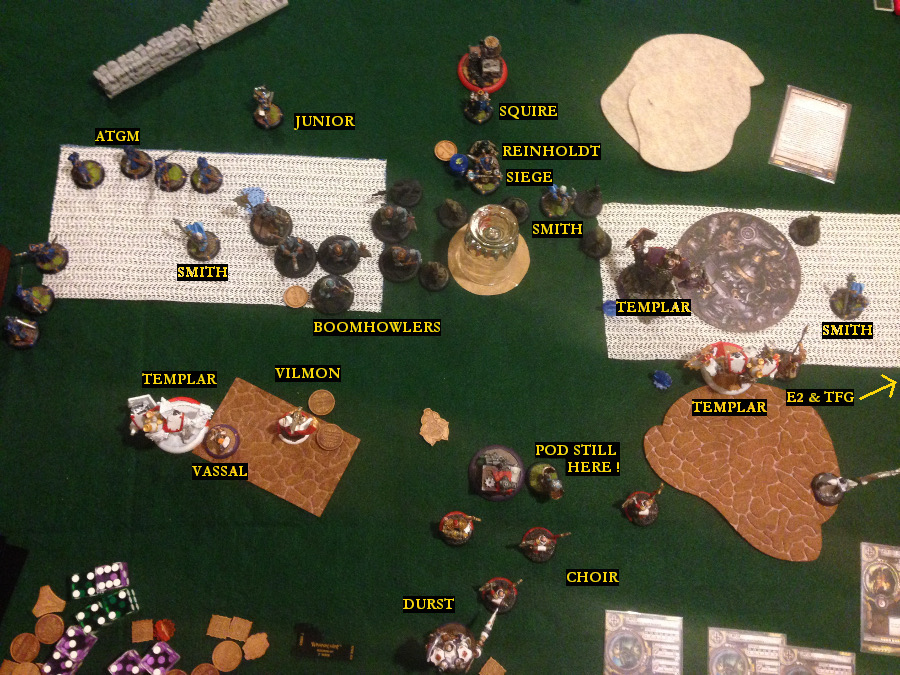
TURN 3: PROTECTORATE
Ok. Those Stormsmiths have to go. There is just too much disruption on the table. Also, I need to start clearing a zone if I want to get anywhere because now Siege is just camping a ridiculous amount of focus. Fortunately I have made it to Turn 3 without needing to Feat. That means it is time for a solid Durst Feat turn. The left side Templar gets fully loaded. The closest Templar to the Pod backs up and smashes it. I use the BeatBack to reposition forward slightly. The Choir run around trying to get out of the way. I don't have any good way to reach more than the Templar on the left, but that is going to force the entire unit to shift hard in that direction. Oh well. Mistake #3: I leave a bunch of Choir just out in the open. Durst charges far off target to go Base to Base with a Templar. The loaded Templar goes to town on Boomhowler himself and the Stormsmith on that side. After pasting the Stormsmith, It takes all the remaining attacks to finally get Boomhowler to fail a tough check. Vilmon and Vassal button up with the Templar. Vilmon drops a Boomhowler, but it toughs. The Vassal Ancillary Attacks the Templar who hits another Boomhowler, but that one toughs as well. The TFG Leader and Officer Combine Melee and manage to kill Eiryss2. The forward Templar waddles forward and pastes another Stormsmith. If I had been able to reach the lead Templar, No Spelling it, instead of Battling the other, would have been really cool.

TURN 4: CYGNAR
With the Feat up and my important pieces bunkered into Templars, all the AGTM and Siege can do is take out whatever Choir I left in the breeze. They do manage to kill the Choir leader in the trench. By the end of the turn, I have one Choir member left. Siege also manages to Force Hammer the forward Templar. He knocks it back into a Ranger which gets turned into jelly. Maybe this is what snaps them back into focus, because the Rangers manage to rally. All the Boomhowlers manage to do is stand up. Siege gets into the zone by the end of his activation.

TURN 4: PROTECTORATE
I have big plans for this turn, but I have a small focus issue. I need to allocate enough to the lead Templar to give it up and into the Objective, but I can't afford to overcommit. I want to put Durst deep into the flank of the zone. I need the Stormsmith dead. On the other side, I need to keep the ATGM and the Boomhowlers tied up working on that Templar. I don't have a ton of models on the table, but three Templars is still three really heavy jacks. The goal is to contest as hard as I can and move towards a scenario victory.
Durst puts one focus on the center Templar, two focus on the lead Templar, one is used to shake Knockdown. The TFG manage to kill the Stormsmith, and position themselves in such a way that Durst can charge them to extra distance. The Choir can't reach the lead Templar, so he moves into the Zone and Battles the center Templar. That Templar charges a Ranger, smashes it, moves forward with a BeatBack, hammers a second with the shield, then buys an attack to crush a third Ranger and BeatBack backwards to cover the path towards the zone.
Mistake #4 … Durst needs to cast Boundless Charge on the lead Templar … therefore he can't fail a charge. He has to opt to advance into the Zone, cast Boundless Charge on the Templar, and Rampart Stance camping 1. The lead Templar charges the Objective for free (Boundless Charge) and rolls GARBAGE on damage. After three attacks the objective is left at 2. This is the Templar that almost gets it done all game. Almost on the Stormwall, almost on the Objective. Whelp. The only other thing I can do is attempt to Arcane Bolt it with the Vassal. The Bolt hits but fails to break armor. Le Sigh. Vilmon and the left Templar successfully murder two Boomhowlers, but the third makes a tough check. At least that will gum up any sort of Assault. Durst manages to score a Control Point.
SCORE: CYGNAR 0, PROTECTORATE 1
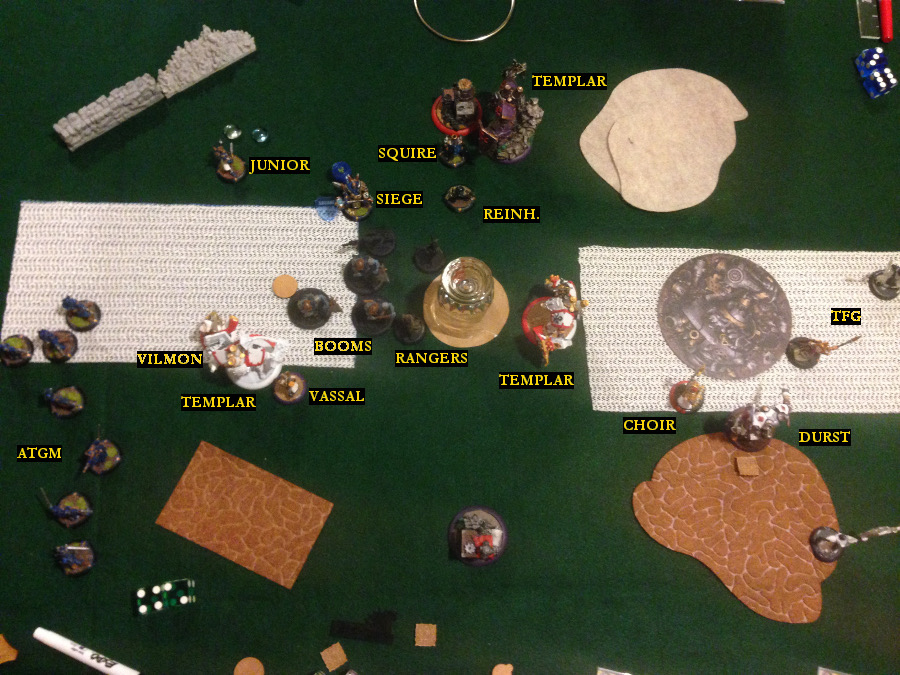
TURN 5: CYGNAR
Siege charges Vilmon and misses on the swing. He buys an attack but fails to break armor and then decides to stop attacking. Rangers run to contest zone. The second Vassal killed by ATGM who then proceed to push the Templar out of the zone. Some of them scratch up the Objective. Arcane shield gets swapped to Siege.
SCORE: CYGNAR 0, PROTECTORATE 1
.
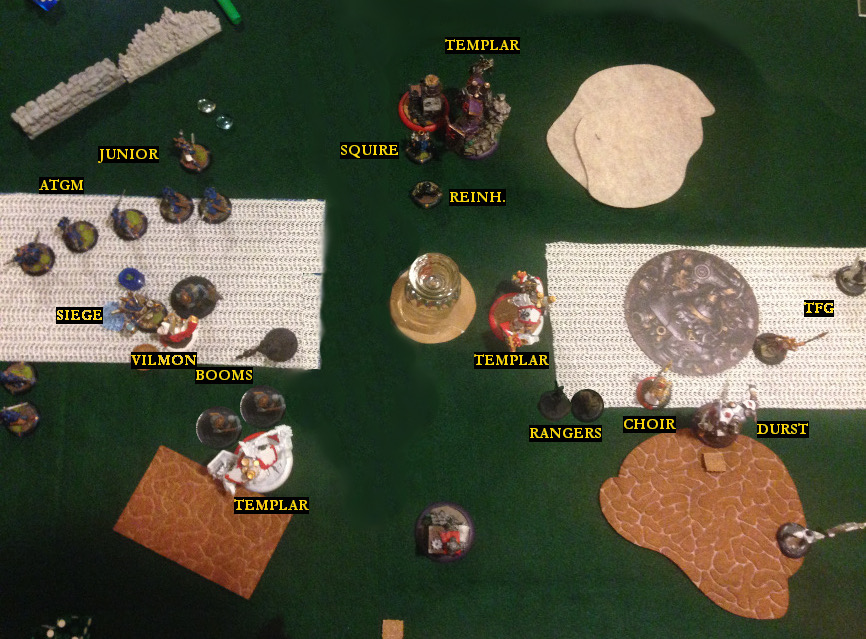
TURN 5: PROTECTORATE
The goal here is to clear the zone and grind down as much of the rest of the Cygnar forces as I can while still giving Siege a clear and present danger to consider. So far, Shamrod has not been able to free up his ATGM to come across the field and cause trouble on the other side. In a previous game we played, he was able to use Thunderbolt to deny me access to a zone late game and he won as a result. I need to get ahead far enough that he won't be able to manage to do that again.
The left Templar kills the two Boomhowlers engaging him. Sadly, sort of unsurprisingly at this point, the Boomhowlers fail command. Durst advances and blows up Rangers contesting the zone to clear it. Since the Gunmages have Truesight, Durst casts Deflection (the Cloud isn't going to help him). Durst in melee is so much fun, but you have to earn it by playing a tight opening game. The lead Templar smashes the Objective and follows-up by trying to remove the Squire (Dice off 3 and it gets left on 1). The Choir sings No Spells on central Templar who runs around the obstacle to contest zone. Vilmon swings at Siege but doesn't break armor (Dice off 10). Vilmon is not moving so he can stance up to 21 Armor. The Objective is gone and Durst dominates his Zone giving the Protectorate forces two more Control Points.
SCORE: CYGNAR 0, PROTECTORATE 3
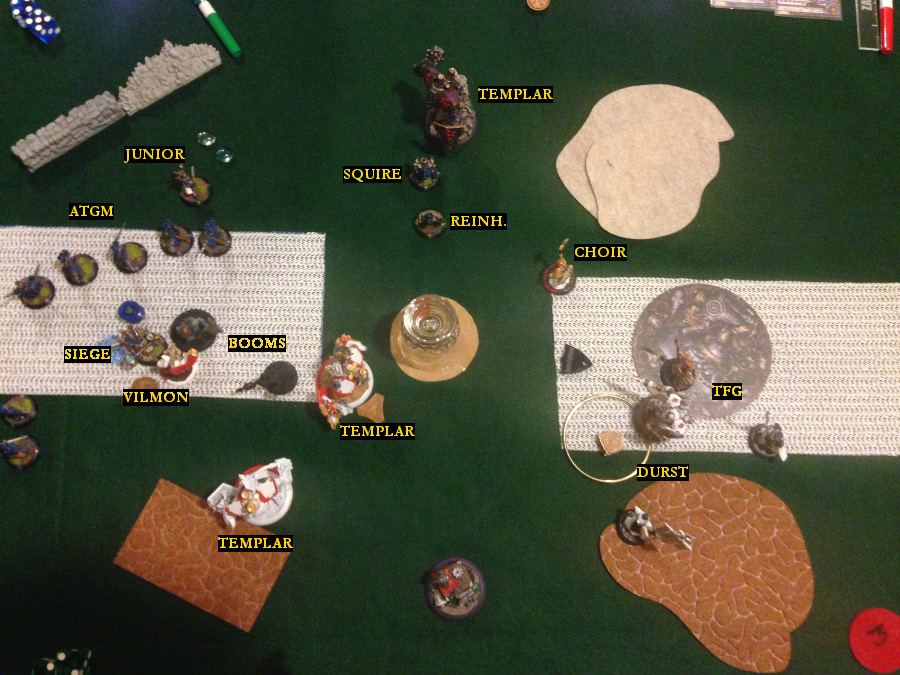
TURN 6: CYGNAR
The ATGM push Vilmon and the Templar out of the Zone in a hilarious series of slightly differently angled shots such that he gets moved something like seven inches but is only 2.5 inches away from the zone. One of them shoots the last Choir member, Deflection doesn't save anyone today. Reinholdt runs to contest. Siege backs up to the edge of the zone. Junior moves to the back of the zone as well. Poor Boomhowlers fail to rally. However, Cygnar has managed to clear the Zone and score a Control Point.
SCORE: CYGNAR 1, PROTECTORATE 3
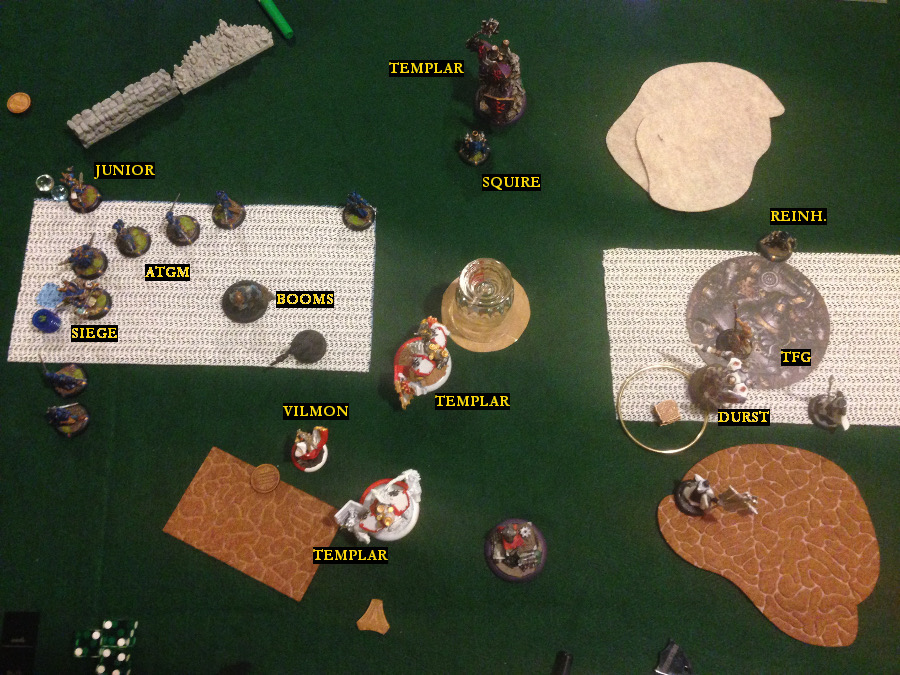
TURN 6: PROTECTORATE
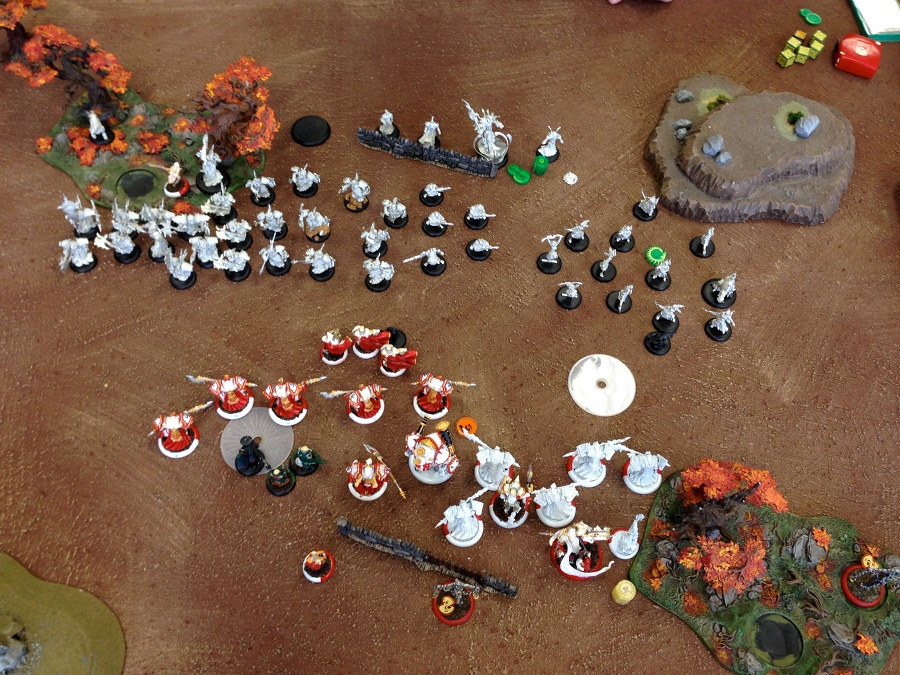
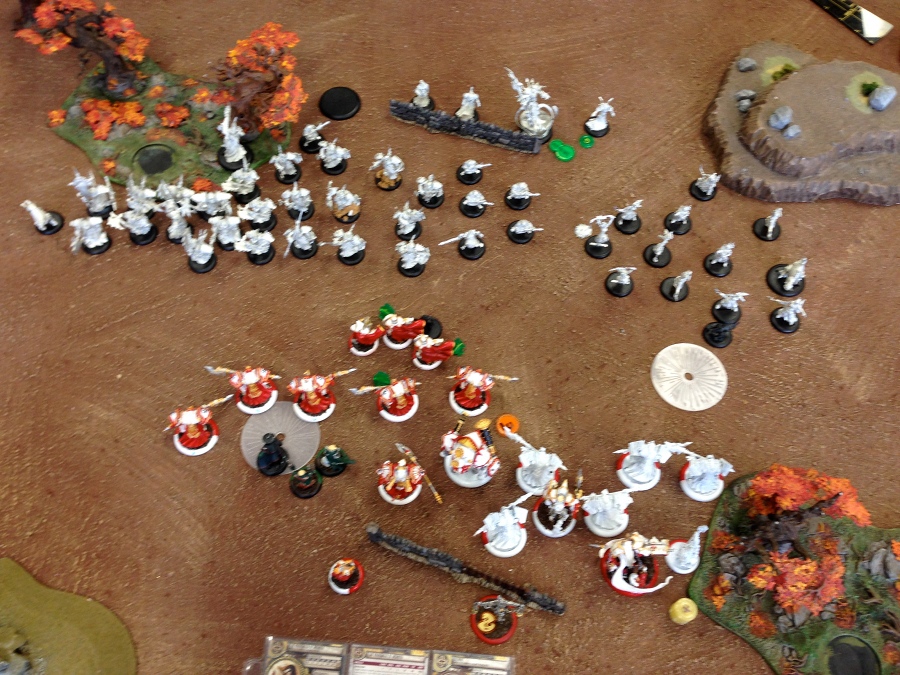
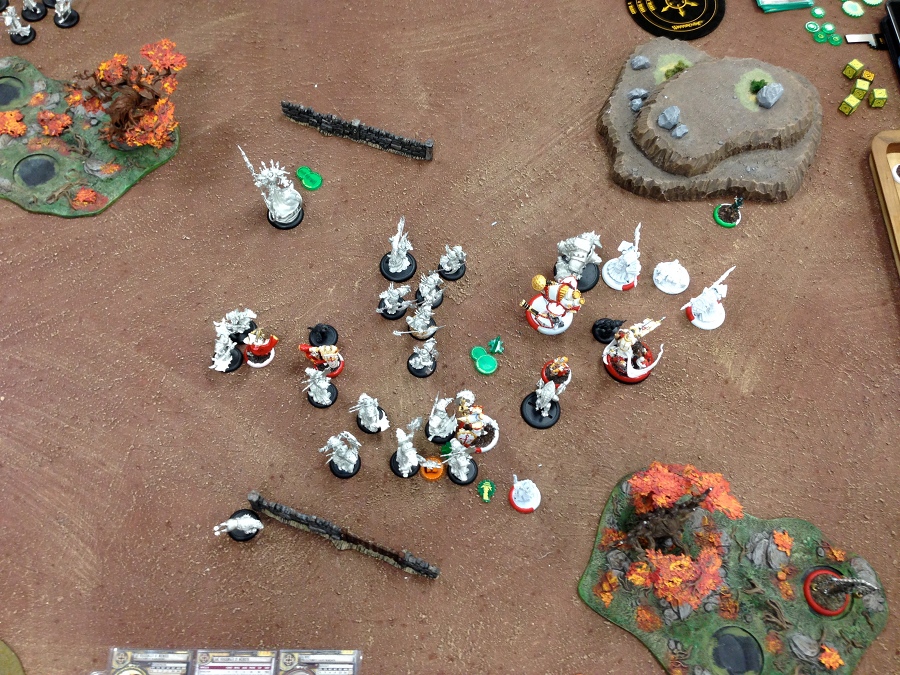
Look at that picture up above. That straight line from Vilmon to Siege is so tasty. All the Thunderbolts pushed the Templar into Durst's Control (it also pushed Vilmon into Deflection). Durst hands out some focus. Vilmon charges Siege and manages to deal ten points of damage even at Dice off eleven. The Templars smash everything on the near side of the Zone to prevent anything from running to contest. The TFG (supertroopers at this point in the battle) engage Reinholdt, he fails command … of course he does, and then he dies to the flaming spears of the Temple Flameguard. Durst backs up to take any sort of Hail Mary assassination off the table. Durst scores the fourth Control Point for Protectorate.
SCORE: CYGNAR 1, PROTECTORATE 4
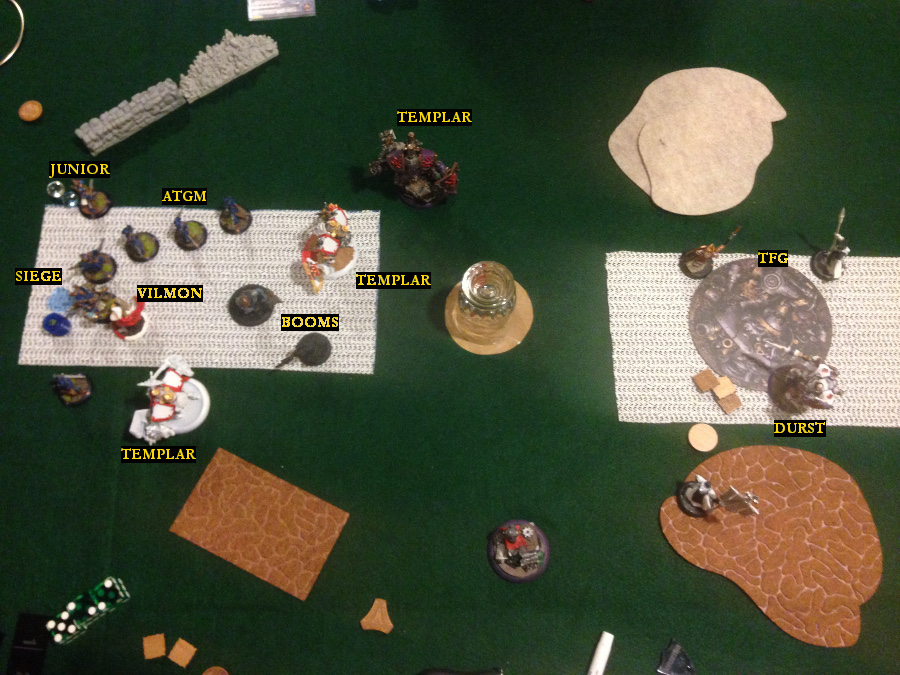
TURN 7: CYGNAR
Unable to run anything into the far zone, Cygnar concedes the battle to Protectorate.
SCORE: CYGNAR 1, PROTECTORATE 5
SCORE: CYGNAR 1, PROTECTORATE 5
Victory for Menoth!!
This game was a blast. We played on the clock, but Shamrod and I play a 90 minute clock instead of a 60. That way we won't accidentally play a four hour game, there is still some time pressure, but we can focus on having a good time. Both of us dislike games that go to time, but we both see the need to have some time element in play. Overall, it was a good back and forth. The opening salvo from Siege was almost enough to break my forces (or at least it felt that way). The Templars really shine with Durst and I even managed to run the list ok without any focus assistance. Shamrod's dice were … below average when he really needed to roll high and above average when he needed to roll low. Even with the ups and downs of dice, he still managed to push me pretty hard. Thanks for the game, Shamrod!